| 
|
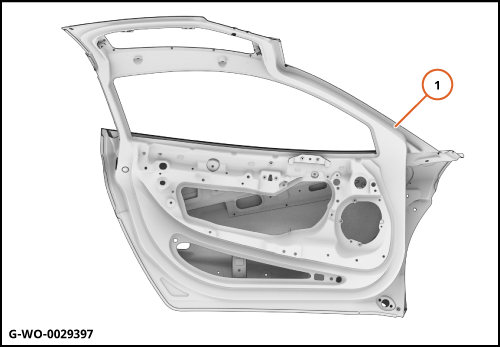
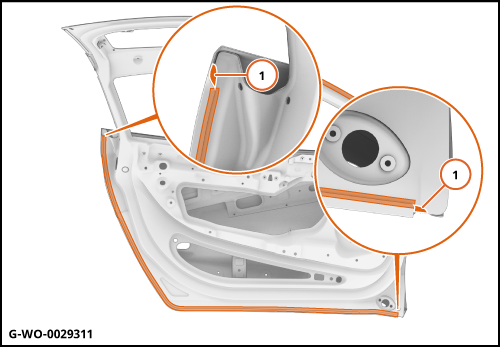
| | | Care Point: | Do a check of the panel to see if the hem joints are sealed. You must seal the hem joints before you paint the panel.
|
| Care Point: | If the hem joints are sealed you can continue the paint process and then install the components in reverse order.
|
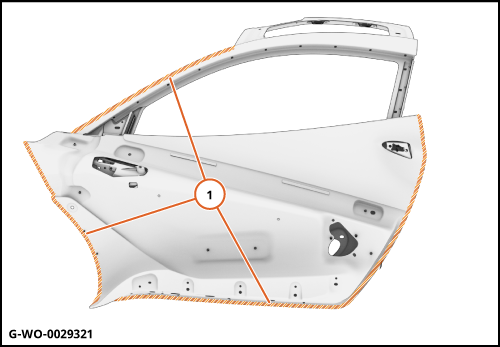
| | | 2. | Apply protection to the areas shown (1).
| | | 
|
| | | Care Point: | Make sure that you do not put tape or sealant on the top surface.
|
| Care Point: | Make sure that the hem edge is fully taped.
|
| Care Point: | Make sure that the tape is visually satisfactory.
|
| Care Point: | When you apply cleaner, obey the manufacturer's flash times.
|
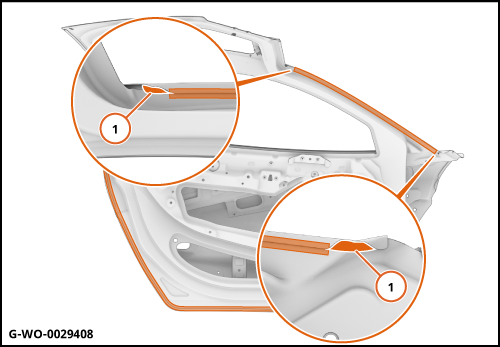
| | | 3. | | | | 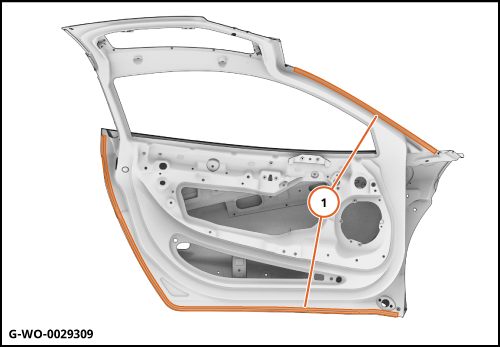
|
| | | Care Point: | Use a spatula to smooth the sealant over the hem.
|
| Care Point: | Make sure that you fully seal the hem.
|
| Care Point: | When you apply sealant, obey the manufacturer's flash times.
|
| | | 4. | | | | 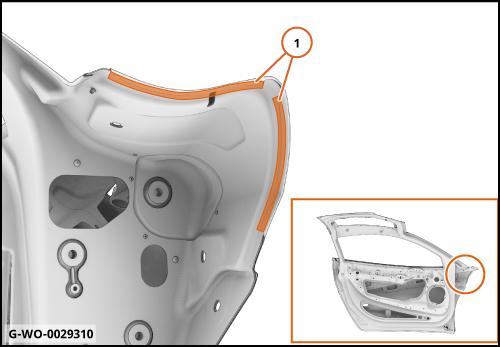
|
| | | Care Point: | Use a spatula to smooth the sealant over the hem.
|
| Care Point: | Make sure that you fully seal the hem.
|
| Care Point: | When you apply sealant, obey the manufacturer's flash times.
|
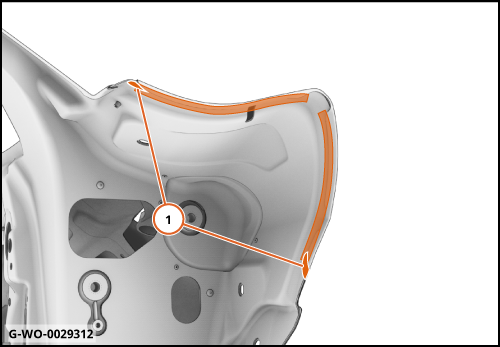
| | | 5. | Remove the unwanted sealant.
| | | 
|
| | | Care Point: | Use a spatula to smooth the sealant over the hem.
|
| Care Point: | Make sure that you fully seal the hem.
|
| Care Point: | When you apply sealant, obey the manufacturer's flash times.
|
| | | 6. | Remove the unwanted sealant.
| | | 
|
| | | Care Point: | Use a spatula to smooth the sealant over the hem.
|
| Care Point: | Make sure that you fully seal the hem.
|
| Care Point: | When you apply sealant, obey the manufacturer's flash times.
|
| | | 7. | Remove the unwanted sealant.
| | | 8. | Remove the protection and continue the paint process.
| | | 9. | Install the remaining components in reverse order.
| | | 
|