Preparation work
| 1. | |
| 2. | Care Point: Disconnect 12V battery during Remove/Install seat procedure.
|
| 3. | Care Point: Remove both sides.
|
| 4. | Care Point: Remove both sides
|
| 5. | Care Point: Remove both sides
|
| 6. | Care Point: Remove both sides
|
| 7. | |
| 8. | |
| 9. | |
| 10. | Care Point: Remove both sides
|
| 11. | |
| 12. | |
| 13. | |
| 14. | |
| 15. | |
| 16. | |
| 17. | |
| 18. | Care Point: When removing the facia, also remove the right hand display control unit bracket.
|
| 19. | |
| 20. | |
| 21. | |
| 22. | |
| 23. | Care Point: Remove both sides.
|
| 24. | Care Point: Disconnect body controller only.
|
| 25. | |
| 26. | Care Point: Vehicles fitted with 12 speakers (High line) Audio system only.
|
| 27. | |
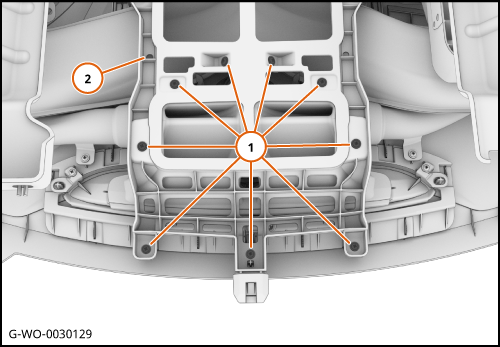
Remove Air vent - Face level fixed - Facia
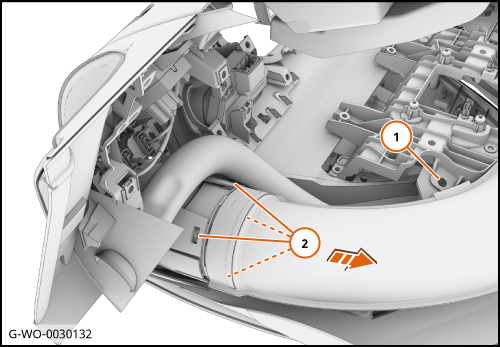
| 1. | Disengage the clip (2).
| | | 
|
| 2. | Remove the reinforcement duct.
| | | 
|
| | | Care Point: | If the duct assembly is the same as (1) then do steps 4 thru 5 .
If the duct assembly is the same as (2) then do steps 6 thru 10.
|
| | | 3. | | | | 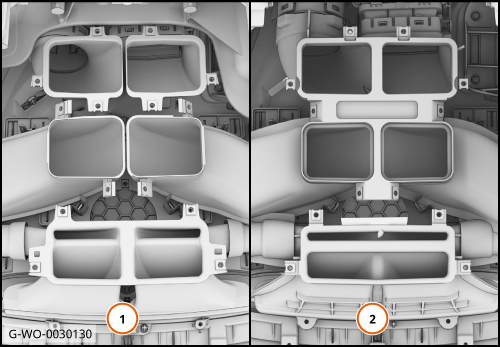
|
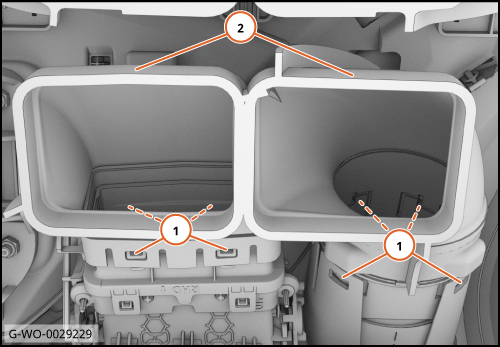
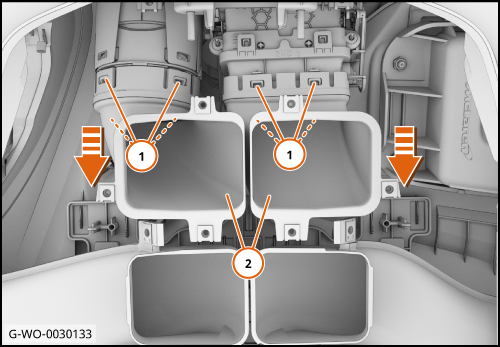
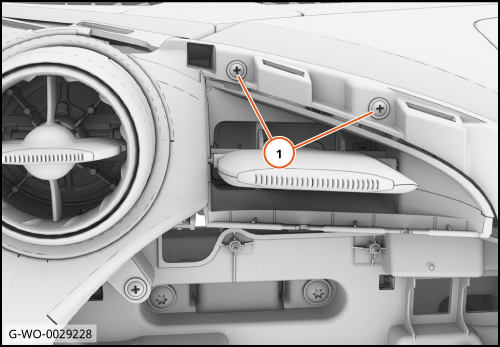
| 4. | Disengage the clips (1).
Remove the ducts (2).
| | | 5. | Do steps 9 thru 10.
| | | 
|
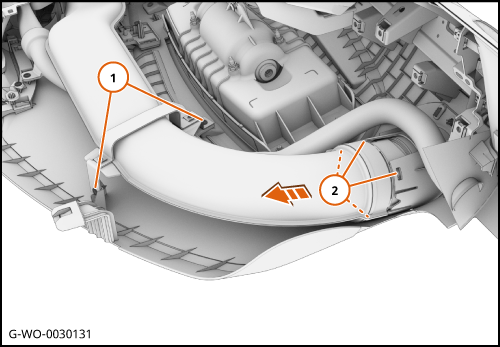
| 6. | Disengage the clips (2).
Remove the duct in the direction shown.
| | | 
|
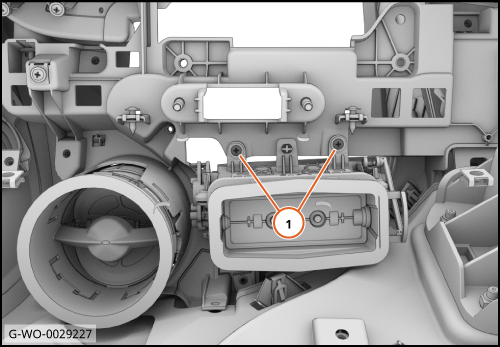
| | | | | 7. | Disengage the clips (2).
Remove the duct in the direction shown.
| | | 
|
| 8. | Disengage the clips (1).
Remove the duct assembly (2) in the direction shown.
| | | 
|
| 
|
| 
|
Install Air vent - Face level fixed - Facia
| 1. | Install the components in reverse order.
| | |