Preparation work
| 1. | |
| 2. | |
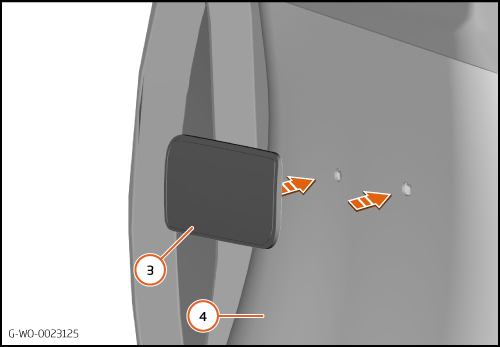
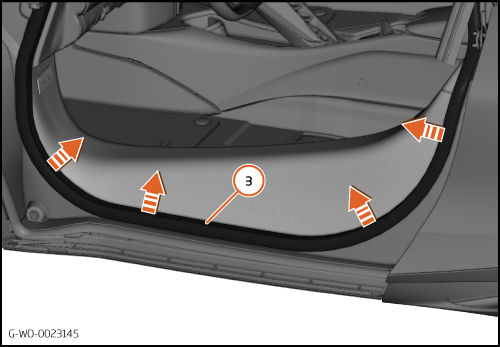
| 3. | Care Point: Remove both sides.
|
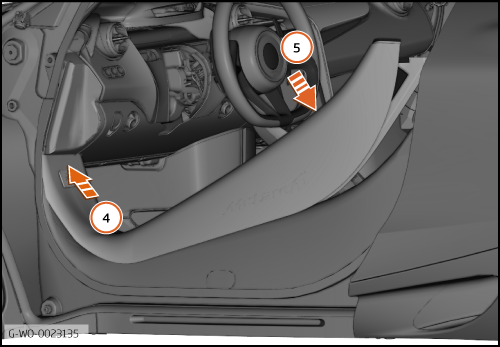
| 4. | Care Point: Remove both sides.
|
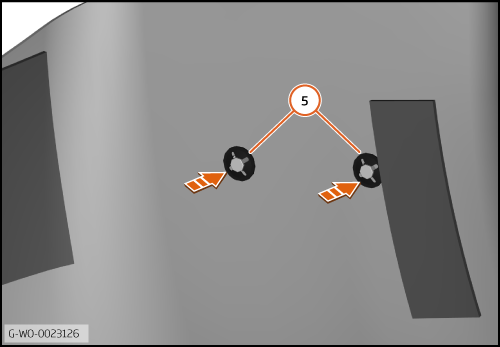
| 5. | |
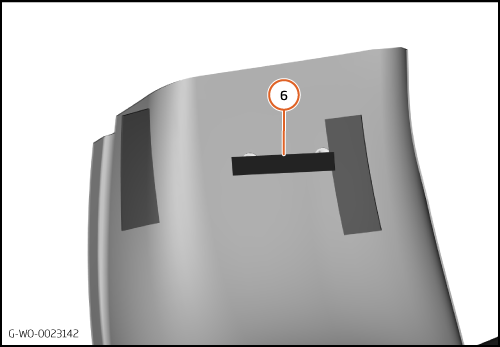
| 6. | |
| 7. | |
| 8. | |
| 9. | |
| 10. | |
| 11. | |
| 12. | |
| 13. | |
| 14. | Care Point: If fitted.
|
| 15. | |
Install MSO Extended sill covers - Carpet - Main - Driver
| | | Care Point: | Keep the clips from the carpet. They will be used in a subsequent step.
|
| | | 1. | Discard the old carpet.
| | | 2. | Discard the old sill cover.
| | |
|
| | | | | 3. | The illustration shows the adhesive tape location (1) on the outer side of the carpet.
| | | | | Care Point: | When you apply cleaner and promoter obey the manufacturer's flash times.
|
| Care Point: | Make sure that you do the steps that follow for the correct areas of the monocoque.
|
| | | 4. | Use BETACLEAN 3900 to clean the areas of the monocoque where the adhesive tape will attach (1).
| | | 5. | | | | 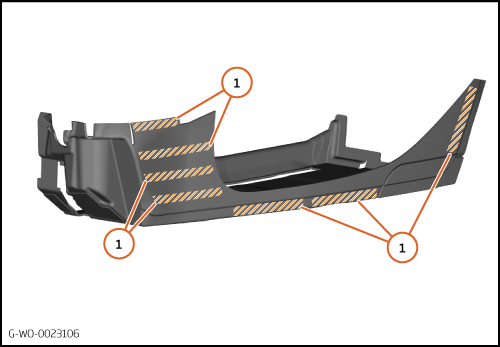
|
| 6. | The illustration shows the adhesive tape location (2) on the front of the carpet.
| | | 7. | Use BETACLEAN 3900 to clean the areas of the monocoque where the adhesive tape will attach (2).
| | | 8. | | | | 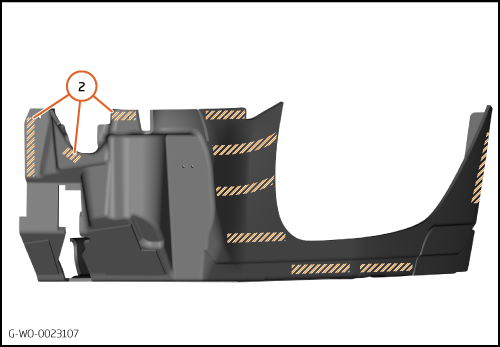
|
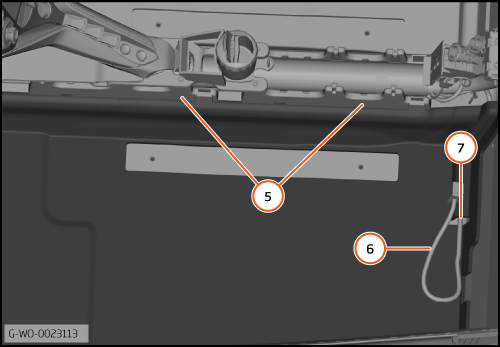
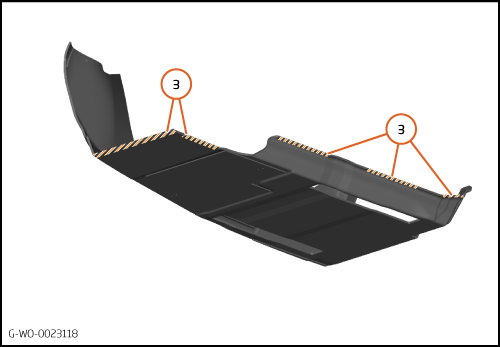
| 9. | The illustration shows the adhesive tape location (3) on the rear and inner side of the carpet.
| | | 10. | Use BETACLEAN 3900 to clean the areas of the monocoque where the adhesive tape will attach (3).
| | | 11. | | | | 12. | Position the carpet in the vehicle.
| | | 
|
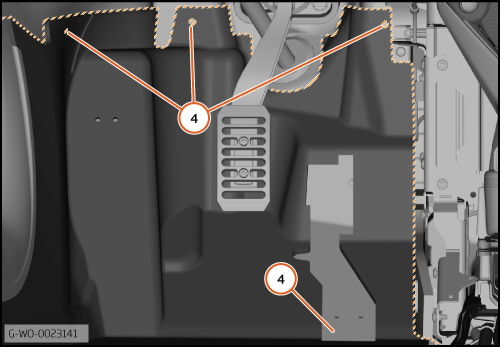
| 13. | Make sure the carpet is located correctly at the front (4).
| | | 
|
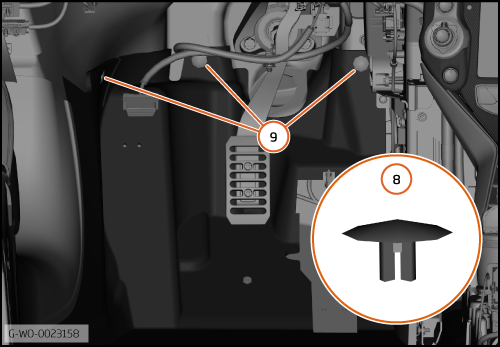
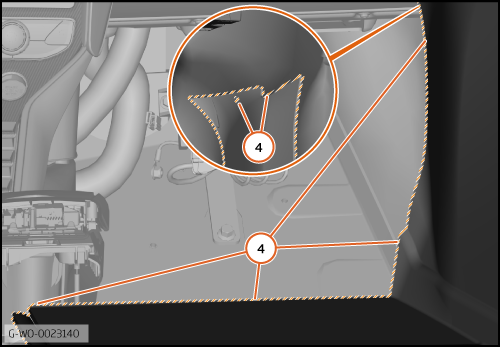
| 14. | The carpet (5) must fit below the tunnel console brackets.
| | | 15. | The seat electrical harness (6) must be put through the hole (7).
| | | 
|
| | | Care Point: | Do the next step only when you are sure that the carpet is located correctly.
|
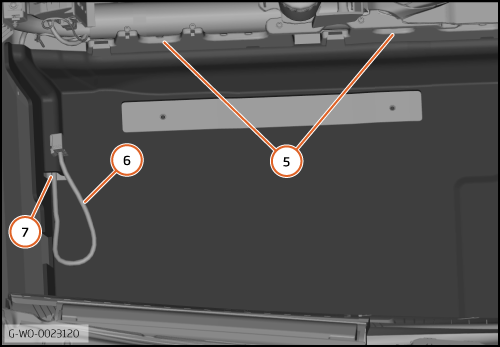
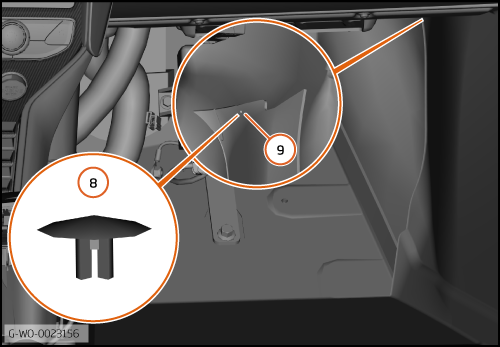
| | | 16. | Remove the backing from the adhesive tape at the front of the carpet.
| | | 17. | Install the 3 clips 00RM006 (8) into the locations (9).
| | | 18. | Remove the remaining backing from the adhesive tape.
| | | 
|
| | | Care Point: | Make sure that the adhesive tape is attached correctly.
|
| Care Point: | Some components have been made transparent in the illustration that follows.
|
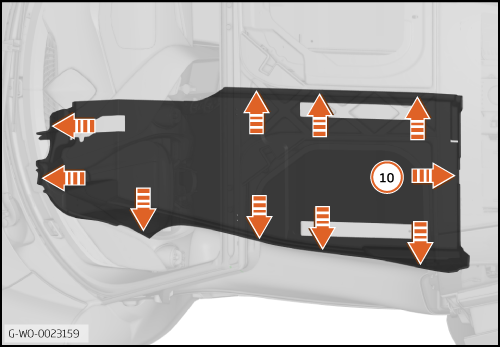
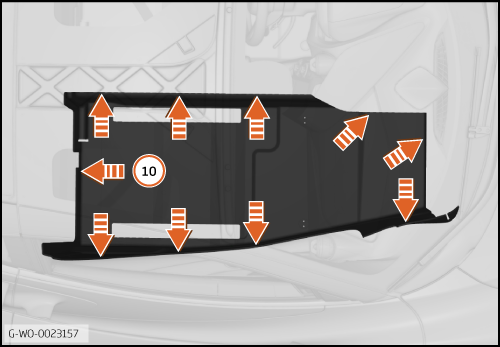
| | | 19. | Start at the rear (10) and apply pressure to attach the adhesive tape.
| | | 
|
Install MSO Extended sill covers - Carpet - Main - Passenger
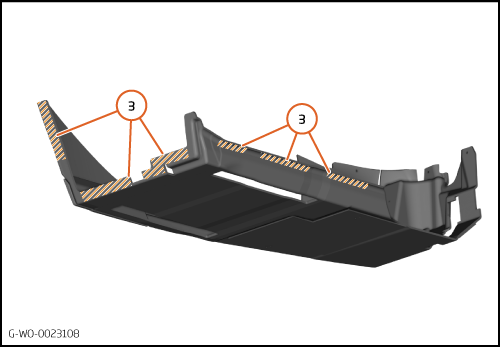
| 1. | The illustration shows the adhesive tape location (1) on the outer side of the carpet.
| | | | | Care Point: | When you apply cleaner and promoter obey the manufacturer's flash times.
|
| | | 2. | Use BETACLEAN 3900 to clean the areas of the monocoque where the adhesive tape will attach (1).
| | | 3. | | | | 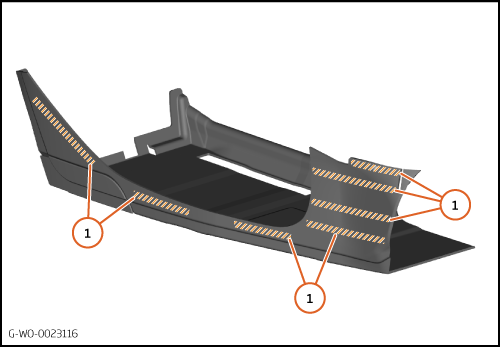
|
| 4. | The illustration shows the adhesive tape location (2) on the rear of the carpet.
| | | 5. | Use BETACLEAN 3900 to clean the areas of the monocoque where the adhesive tape will attach (2).
| | | 6. | | | | 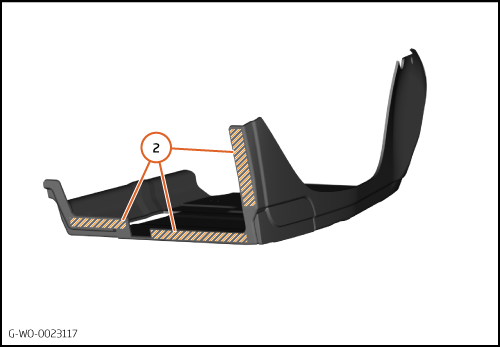
|
| 7. | The illustration shows the adhesive tape location (3) on the bottom of the carpet.
| | | 8. | Use BETACLEAN 3900 to clean the areas of the monocoque where the adhesive tape will attach (3).
| | | 9. | | | | 10. | Put the carpet in position on the vehicle.
| | | 
|
| 11. | Make sure the carpet is located correctly at the front (4).
| | | 
|
| 12. | The carpet (5) must fit below the tunnel console brackets.
| | | 13. | The seat electrical harness (6) must be put through the hole (7).
| | | 
|
| | | Care Point: | Do the next step only when you are sure that the carpet is located correctly.
|
| | | 14. | Remove the backing from the adhesive tape at the front of the carpet.
| | | 15. | Install the clip 00RM006 (8) into the location (9).
| | | 16. | Remove the remaining backing from the adhesive tape.
| | | 
|
| | | Care Point: | Make sure that the adhesive tape is attached correctly.
|
| Care Point: | Some components have been made transparent in the illustration that follows.
|
| | | 17. | Start at the rear (10) and apply pressure to attach the adhesive tape.
| | | | | Care Point: | It is not necessary to engage the B-Pillar trim clips at this time.
|
| | | 18. | Install the components in reverse order.
| | | 
|
Install MSO Extended sill covers - Dedication plate
| | | Care Point: | When you apply cleaner and promoter obey the manufacturer's flash times.
|
| | | 1. | | | | 2. | | | | 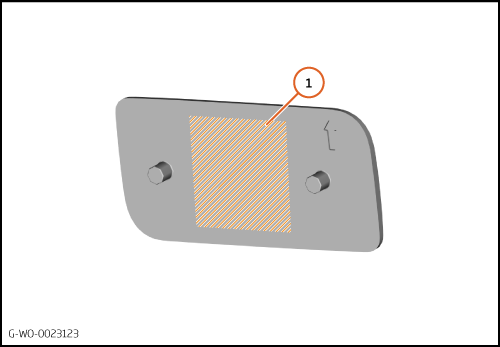
|
| | | | | 3. | Cut a 20mm x 12mm piece of 3M 06506 adhesive tape.
| | | 4. | Attach the adhesive tape in the middle as shown (2).
| | | 
|
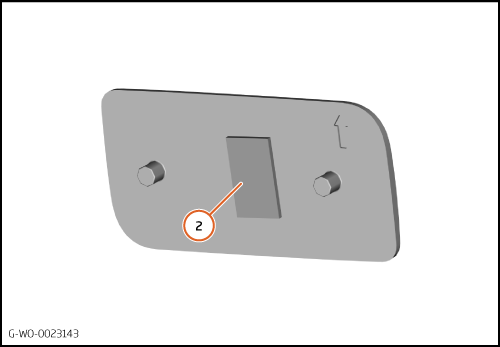
| 5. | Install the dedication plate (3) to the sill cover (4).
| | | 
|
| 6. | Install 2 00RA368 star lock washers (5) onto the pins.
| | | 
|
| 7. | Cut a 70mm x 12mm piece of 00RL004 felt tape.
| | | | | Care Point: | Make sure that the felt tape bond is satisfactory.
|
| | | 8. | Attach the felt tape (6) across both star lock washers.
| | | 
|
Install MSO Extended sill covers
| | | Care Point: | Some components have been made transparent in the illustration that follows.
|
| | | 1. | The illustration shows the dual-lock (1) and adhesive tape (2) bonding locations on the sill cover.
| | | | | Care Point: | When you apply cleaner and promoter obey the manufacturer's flash times.
|
| | | 2. | Use BETACLEAN 3900 to clean the areas of the monocoque where the dual-lock (1) and adhesive tape (2) will attach.
| | | 3. | | | | 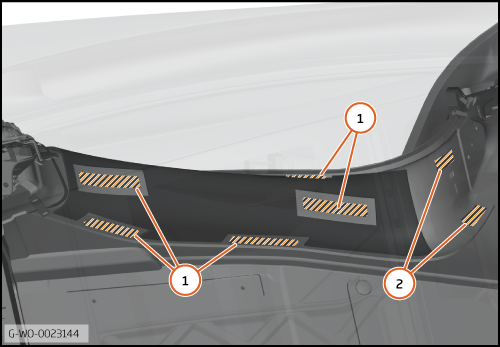
|
| 4. | Remove the lower section of the primary door seal (3).
| | | 
|
| | | Care Point: | Do not remove the adhesive backing from the sill cover at this time.
|
| | | 5. | Put the sill cover into position in the direction shown (4) then (5).
| | | 
|
| 6. | Make sure the sill cover is installed correctly behind the facia (6).
| | | 
|
| 7. | Install the B-Pillar trim.
| | | 8. | Make sure the sill cover is installed correctly below the B-Pillar trim (7).
| | | 9. | Remove the B-Pillar trim again.
| | | 
|
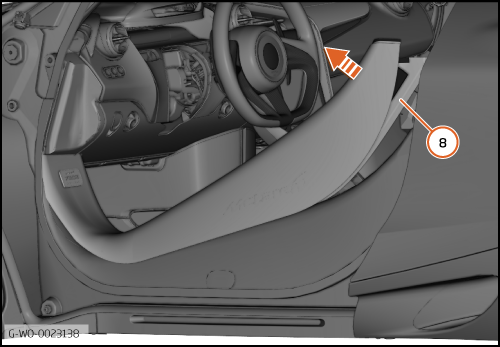
| 10. | Lift the sill cover up at the rear (8).
| | | 11. | Remove the backing from the dual lock and adhesive tape.
| | | 
|
| | | Care Point: | Some components have been made transparent in the illustration that follows.
|
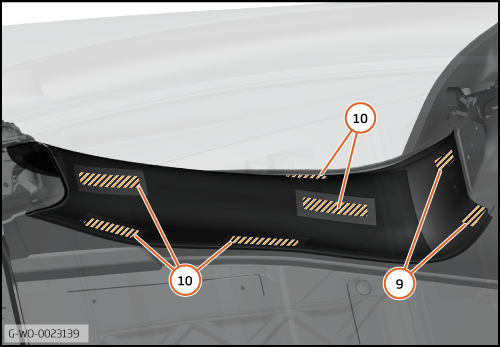
| | | 12. | Put the sill cover into position.
| | | 13. | Push the adhesive tape (9) and dual-lock (10) locations.
| | | 14. | Make sure that the bond is satisfactory.
| | | 15. | Install the B-Pillar trim.
| | | 
|