Preparation work
| 1. | |
| 2. | |
| 3. | |
| 4. | |
| 5. | |
| 6. | Care Point: Do the two sides
|
| 7. | Care Point: Do the two sides
|
| 8. | |
| 9. | |
| 10. | |
| 11. | |
| 12. | |
| 13. | |
| 14. | |
| 15. | |
| 16. | |
| 17. | |
 WARNING! WARNING!
| |
Risk of burning and fire when handling hot or glowing objects!
Unprotected contact with hot or glowing objects can cause severe burns to the skin and eyes. If glowing objects come into contact with water, hot steam or hot splashing water this can result in severe skin and eye burns. Severe and possibly permanent injuries can result if hot or glowing objects come into contact with unprotected skin or eyes. Fire can result if glowing objects come into contact with flammable materials or substances.
Wear protective clothing, safety glasses and heat resistant gloves.
| • | Avoid sparks and keep objects away from flammable materials and substances when handling glowing objects.
|
| |
 CAUTION! CAUTION!
| |
Risk of injury when handling sharp vehicle parts!
Injuries are possible from cutting, scratching or scraping against the burr when working on body, superstructure, assembly and chassis parts which cannot be or are not yet deburred due to production procedure or processing stage.
Wear protective gloves when working with sharp vehicle parts.
| • | Deburr repair panels and processed cut edges.
|
| |
Remove catalytic converter and link pipe assembly - Right
| | | Care Point: | Always replace the nuts. Refer to the Spare Parts Catalogue (SPC) for part numbers.
|
| | | 1. | | | | 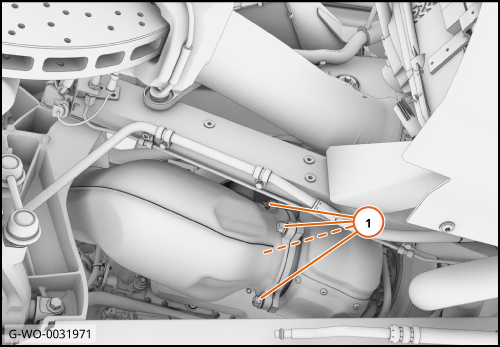
|
| | | Care Point: | Record the clamp positions. This will help you during the installation procedure.
|
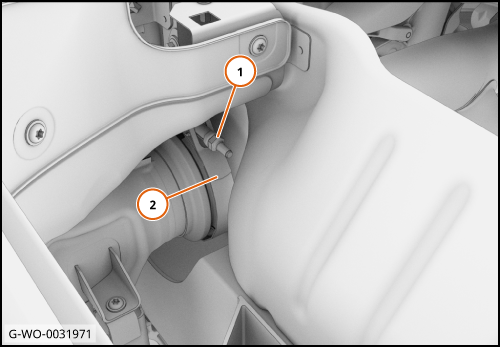
| | | 2. | Remove the nut (1) 14 Nm.
Disengage the clamp (2) and move aside.
| | | 3. | Do step 2 to the other side.
| | | 
|
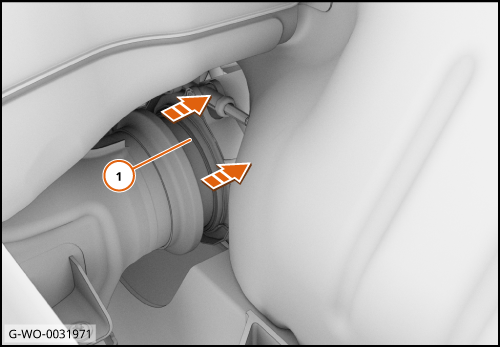
| 4. | Move the muffler (1) in the direction shown.
| | | 
|
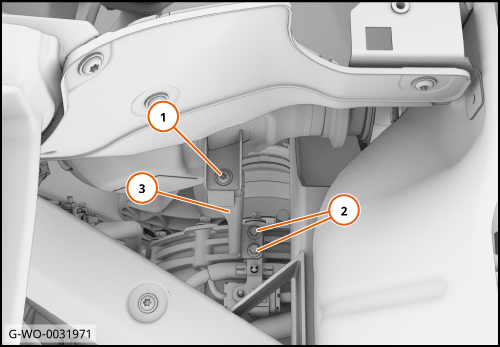
| 5. | Remove the support bracket (3).
| | | 
|
| | | Care Point: | Risk of damage. Be careful with easily damaged parts and trim.
|
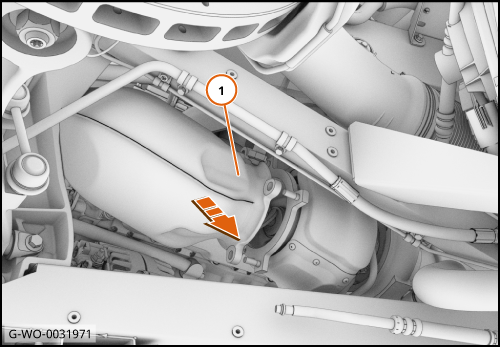
| | | 6. | Remove the link pipe (1) in the direction shown.
| | | 
|
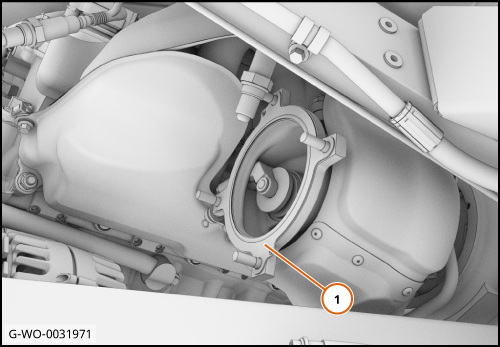
| | | Care Point: | Always replace the gasket. Refer to the SPC for part numbers.
|
| | | 7. | Remove the gasket (1) and discard.
| | | 
|
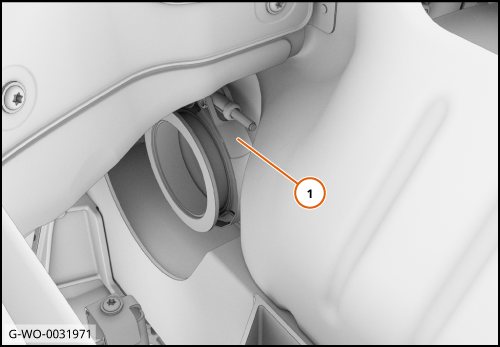
| | | Care Point: | Always replace the clamp. Refer to the SPC for part numbers.
|
| | | 8. | Remove the clamp (1) and discard.
| | | 9. | Do step 8 to the other side.
| | | 
|
Install catalytic converter and link pipe assembly - Right
| 1. | Install the turbocharger gasket.
| | | | | Care Point: | Make sure that the clamp bolts face inboard on both sides.
|
| | | 2. | Put the muffler clamps on to the muffler.
| | | | | Care Point: | Do not torque the fixings at this stage.
|
| | | 3. | Install the link pipe on to the turbocharger and hand tighten the nuts.
| | | 4. | Install the support bracket and hand tighten the bolts.
| | | 5. | Install the muffler on to the link pipes.
Put the clamps in to the installation position and hand tighten the nuts.
| | | 6. | Check the clearance of link pipe assembly, adjust the position as required.
| | | 7. | Torque the link pipe to turbocharger flange nuts.
| | | 8. | Torque the support bracket bolts.
| | | 9. | Torque the muffler clamps.
| | | 10. | Install the remaining components in reverse order.
| | | 11. | Carry out an engine heat cycle drive.
| | | | | Care Point: | Allow vehicle to cool down for 30-60 minutes.
|
| | | 12. | Remove the following components:
| | | 13. | Re-torque:
| | | 14. | Install components in reverse order.
| | |