Preparation work
Remove Seal - Door secondary - Upper
| | | Care Point: | Risk of damage. Be careful with easily damaged parts and trim.
|
| Care Point: | Record the seal position. This will help you during the installation.
|
| Care Point: | If the seal is removed it must be replaced.
|
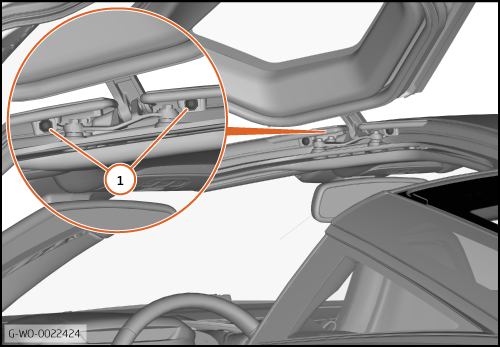
| | | 1. | Remove the bolts (1) (M6x12) 6 Nm and remove the upper door hinge cover.
| | | 
|
| 
|
| 3. | Disengage the two plugs (3) from the wiper cover.
| | | | | Care Point: | Risk of damage. Be careful with easily damaged parts and trim. The seal is bonded to the vehicle body in various locations.
|
| | | 4. | Start at the front fender and remove the seal from the vehicle body.
| | | 
|
Install Seal - Door secondary - Upper
| | | Care Point: | Any remaining adhesive must be removed. Apply protection to the panels to prevent damage.
|
| Care Point: | When you apply cleaner and promoter obey the manufacturers flash times.
|
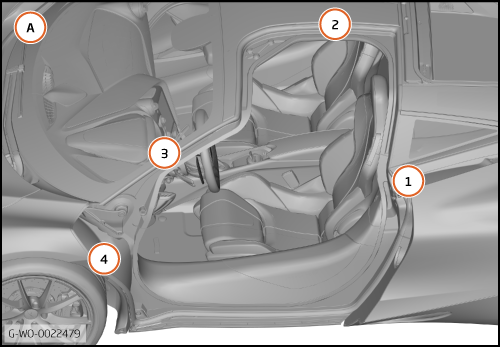
| | | 1. | Illustration (A) identifies the areas that must be cleaned and promoted. Refer to illustrations (1) thru (4) below for further detail.
| | | 
|
| | | Care Point: | Make sure the cleaning products do not contact the rubber seals.
|
| | | 2. | | | | 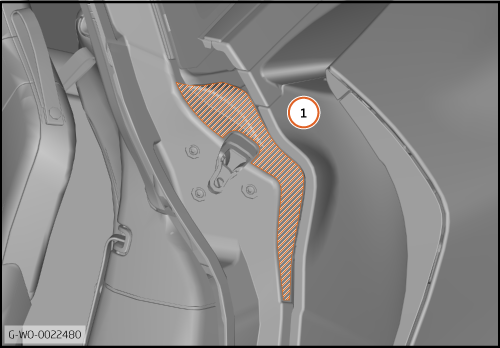
|
| 
|
| 
|
| 
|
| | | Care Point: | Make sure the seal is flat to prevent water leaks.
|
| Care Point: | Make sure the seal is installed in the correct position behind the upper door hinge.
|
| Care Point: | Make sure the seal is bonded in a straight line at the door glass upper.
|
| Care Point: | Make sure the seal is pushed up against the roof panel. No gaps must be present.
|
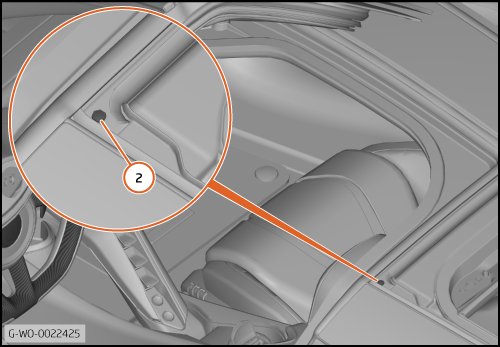
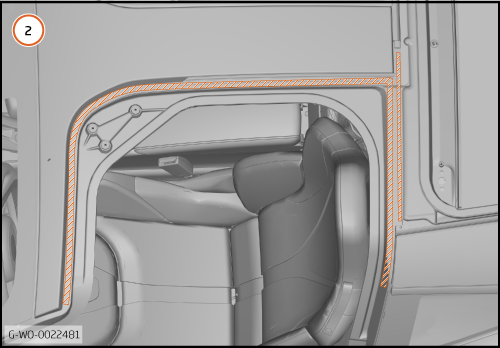
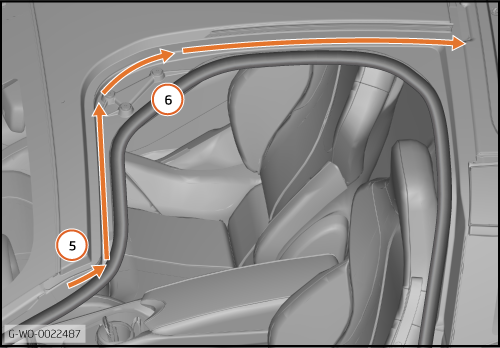
| | | 6. | Remove the first part of the adhesive backing tape from the seal at the A pillar (5) and align the seal around the A pillar and roof panel (6).
Remove the tape backing while you push firmly down to fasten the seal. Install the seal in a clockwise direction and stop at the rear roof panel.
| | | 
|
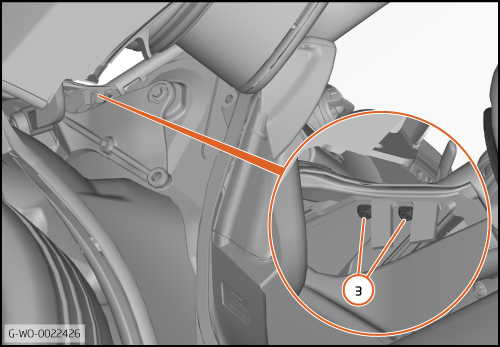
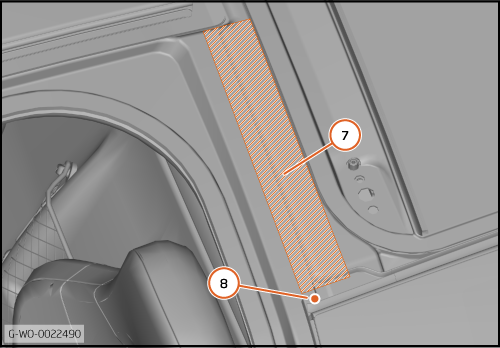
| | | | | 7. | Remove the first parts of the adhesive backing tapes from the seal, position the seal along the surface of the rear structure (7) and refit the clip (8).
| | | 
|
| | | Care Point: | Make sure the seal is bonded in a straight line at the tailgate engine cover.
|
| Care Point: | Make sure there is no gap when the seal is connected to the other side.
|
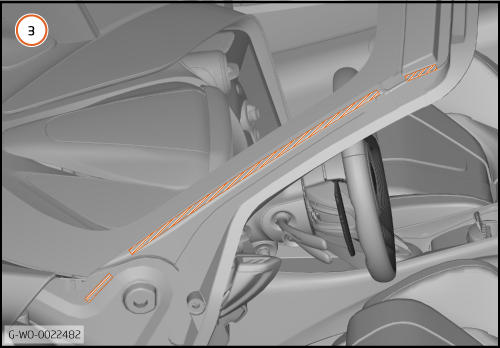
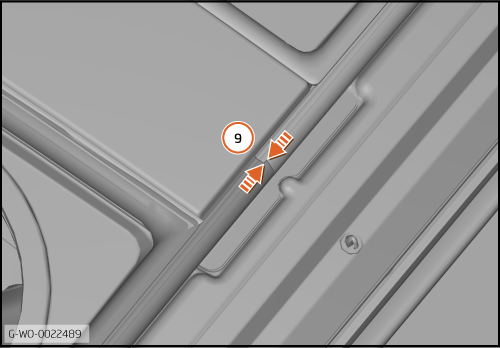
| | | 8. | Connect the seal to the opposite seal at the rear of the roof panel (9).
| | | 9. | Remove the tape backing while you push firmly down to fasten the seal. Stop at the tailgate glass area.
| | | 
|
| | | Care Point: | Make sure the seal is correctly installed under the quarter glass upper moulding.
|
| Care Point: | Make sure the seal is correctly installed behind the quarter glass.
|
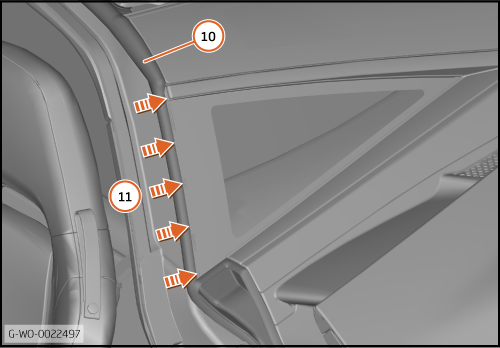
| | | 10. | Remove the adhesive backing tape from the seal at the tailgate glass (10).
Remove the first part of the adhesive backing tape from the seal at the quarter glass (11).
Attach the seal at the tailgate glass area (10).
Insert the seal behind the quarter glass (11) and remove the tape backing while you push firmly down to fasten the seal. Stop at the lower B pillar area.
| | | 
|
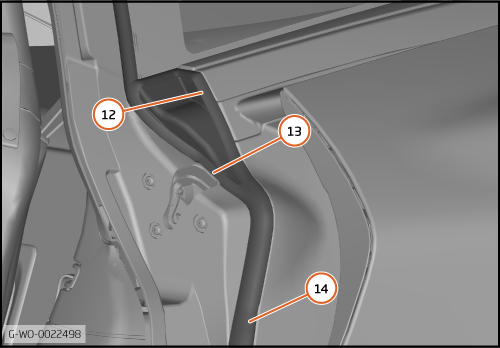
| | | Care Point: | Make sure the seal is correctly located under the bodyside at the bottom of the quarter glass (12).
|
| Care Point: | Make sure the seal does not interfere with the door latch opening (13).
|
| Care Point: | The seal upper must overlap the seal lower (14).
|
| | | 11. | Remove the first part of the adhesive backing tape from the seal and position the seal onto the lower B pillar area.
Remove the tape backing while you push firmly down to fasten the seal.
| | | 
|
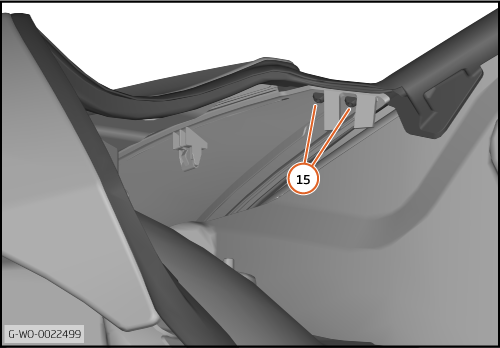
| 12. | Engage the two plugs (15) to the wiper cover.
| | | 
|
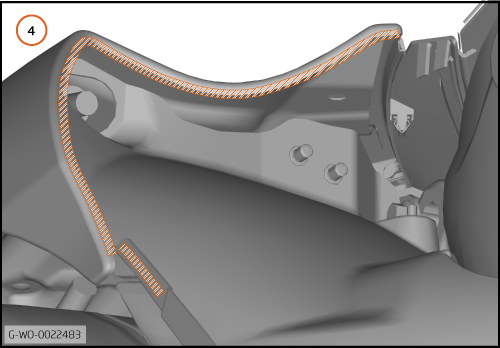
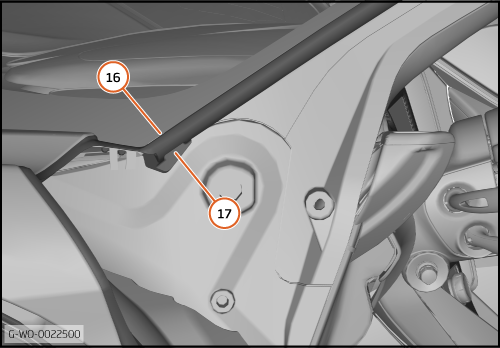
| | | | | 13. | Remove the adhesive backing tape from the seal in locations (16) and (17) at the bottom of the A pillar.
| | | 14. | Attach the seal to the underside of the windscreen (16) then the vehicle body above the door hinge (17).
| | | | | Care Point: | The seal must be engaged under the windscreen and aligned with the edge of the windscreen surround.
|
| | | 15. | Remove the first part of the adhesive backing tape from the seal and position the seal onto the upper A pillar area.
Remove the tape backing while you push firmly down to fasten the seal.
| | | 
|
| | | Care Point: | Make sure the seal is aligned to the fender edge.
|
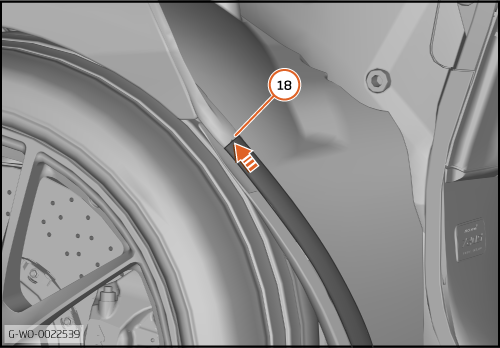
| | | 16. | Install the lower seal end into the upper door seal (18).
| | | 17. | Remove the first part of the adhesive backing tape from the seal at the front fender and wheelarch liner cover.
Position and hold the seal under the front fender then remove the tape backing while you push firmly down to fasten the seal.
| | | 18. | Close the door and confirm alignment to the door and fender.
| | | 19. | Install the remaining components in reverse order.
| | | 20. | Do a functional test of the door seal and related components.
| | | 
|