Preparation work
| 1. | |
| 2. | |
| 3. | |
| 4. | Care Point: Disconnect only.
|
| 5. | Care Point: Disconnect only.
|
Remove wishbone - Rear - Upper
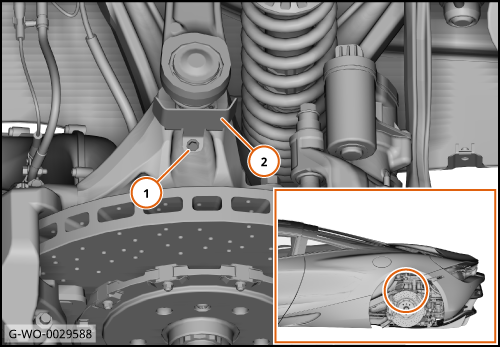
| 1. | Remove the heat shield (2).
| | | 
|
| 2. | | | | | | Care Point: | The use of a ball joint separator tool will aid the next step.
|
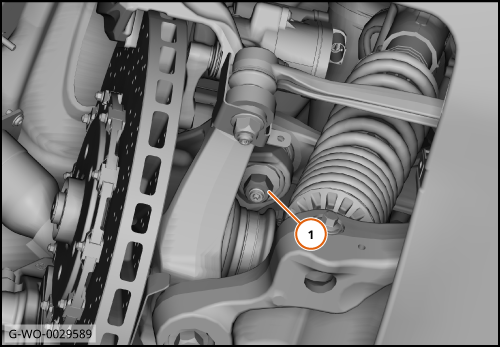
| | | 3. | Separate the upper wishbone from the upright.
| | | 
|
| | | Care Point: | Observe the concentric stepped washer.
|
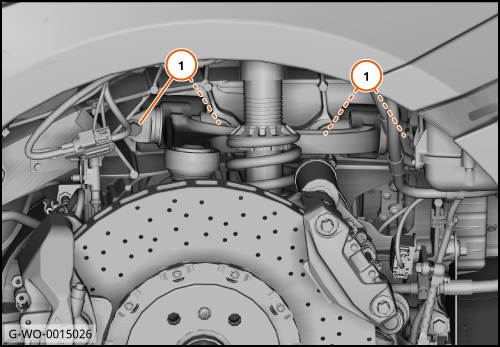
| | | 4. | | | | 5. | Remove the upper wishbone.
| | | 
|
Install wishbone - Rear - Upper
| | | Care Point: | Using a plan M14 half nut.
|
| | | 1. | Install upper wishbone ball joint.
| | | | | Care Point: | Make sure correct orientation of concentric stepped washer.
|
| | | 2. | | | | 3. | Remove half nut.
| | | 4. | | | | 5. | Install remaining components in reverse order.
| | | | | Care Point: | Once vehicle is on ground.
|
| | | 6. | Apply pressure to the top of the wheel, towards vehicle. If excessive inward movement of wheel is detected, the upper wishbone ball joint has failed. The upper wishbone will require replacing.
| | | | | Care Point: | The procedure below must be claimed separately if you make a warranty claim.
|
| | | 7. | Make sure that the suspension geometry is in tolerance.
| | |