Preparation work
| 1. | |
| 2. | |
| 3. | Care Point: Disconnect only.
|
Remove Wishbone - Front - Upper
| 1. | Disconnect the electrical connector (1).
| | |
|
| 2. | Disengage the clips (2).
| | | | | Care Point: | Replace the ball joint nut. Refer to the Spare Parts Catalogue (SPC) for part numbers.
|
| | | 3. | | | | 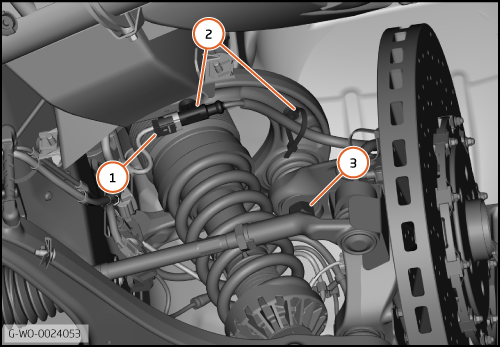
|
| | | Care Point: | The use of a ball joint separator tool will aid the next step.
|
| Care Point: | Shocks can cause damage to the suspension accelerometer.
|
| | | 4. | Disengage the ball joint (4).
| | | | | Care Point: | Replace the wishbone bolts. Refer to the Spare Parts Catalogue (SPC) for part numbers.
|
| | | 5. | | | | 
|
Install Wishbone - Front - Upper
| | | Care Point: | Make sure that you install the wishbone spacers correctly.
|
| | | 1. | Install the wishbone in reverse order.
| | |
|
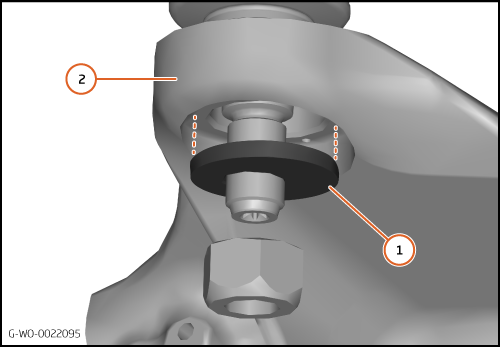
| | | Care Point: | The camber adjustment washer is concentric and must be correctly installed into the upright recess.
|
| | | 2. | Make sure that you install the camber adjustment washer (1) correctly into the upright (2).
| | | | | Care Point: | The procedure below is to make sure that the ball joints are correctly installed into the upright.
|
| | | 3. | Install an M14 plain nut (M14) 50 Nm to the ball joint.
| | | 4. | Remove the M14 plain nut.
| | | 5. | Install the correct ball joint nuts to the ball joints.
| | | 6. | Install the remaining components in reverse order.
| | | | | Care Point: | The procedure below must be claimed separately if you make a warranty claim.
|
| | | 7. | Make sure that the suspension geometry is in tolerance.
| | | 
|