Remove Seal - Door secondary - Lower
| | | Care Point: | Risk of damage. Be careful with easily damaged parts and trim.
|
| Care Point: | Record the seal position. This will help you during the installation.
|
| Care Point: | If the seal is removed it must be replaced. Refer to the Spare Parts Catalogue (SPC) for part numbers.
|
| | | 1. | Start at the rear end of the seal and remove it from the vehicle body.
| | |
Install Seal - Door secondary - Lower
| | | Care Point: | Any remaining adhesive must be removed. Apply protection to the panels to help prevent damage.
|
| Care Point: | Make sure that the cleaning products do not contact the rubber seals.
|
| Care Point: | When you apply cleaner and promoter obey the manufacturers flash times.
|
| | | 1. | | | |
|
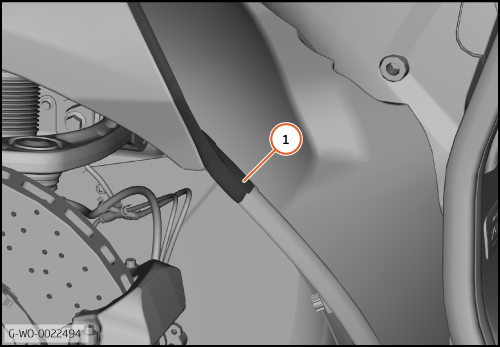
| 2. | Install the front end of the seal into the seal upper (1) at the front wheelarch liner cover.
| | | 
|
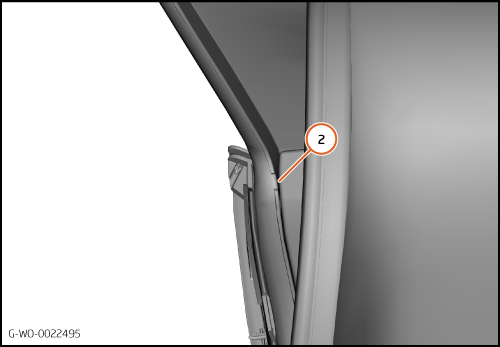
| 3. | Position the seal alignment feature into the slot at the wheelarch liner cover (2).
| | | 4. | Remove the adhesive backing tape from the seal at the seal alignment feature and bond it to the wheelarch liner cover.
| | | | | Care Point: | Align the seal to the wheelarch liner cover edge.
|
| Care Point: | Make sure the seal is flat to prevent water leaks.
|
| | | 5. | Remove the first part of the adhesive backing tape from the seal at the front wheelarch liner cover.
Remove the tape backing while you push firmly down to fasten the seal.
| | | 
|
| | | Care Point: | The rear end of the seal lower must be positioned underneath the seal upper.
|
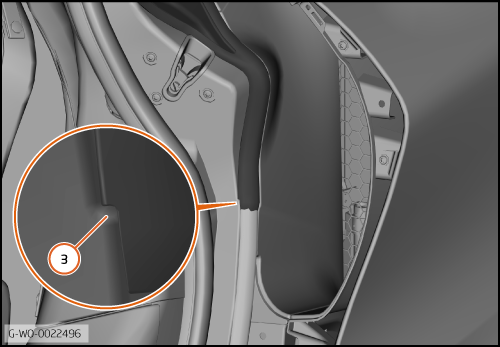
| | | 6. | Remove the adhesive backing tape from the remainder of the seal and bond it to the bottom and rear of the door opening. Align the rear end of the seal with the raised feature on the B pillar (3).
| | | 7. | Close the door and confirm alignment of the seal.
| | | 8. | Do a functional test of the door seal and related components.
| | | 
|