Remove Panel - Hinge cover - Upper
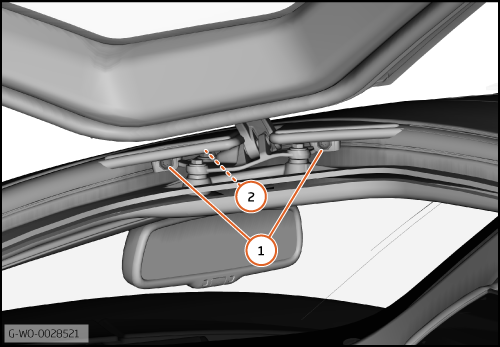
| 1. | Open the door to access and remove the bolts (1). (M6x12) 6 Nm.
Disengage the clip (2).
| | | 2. | Close the door and remove the panel.
| | | 
|
| | | Care Point: | If you are replacing the seal, do the steps that follow.
|
| Care Point: | Always replace the starlock washers. Refer to the Spare Parts Catalogue (SPC) for part numbers.
|
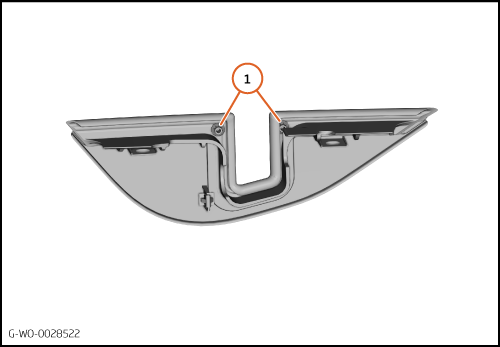
| | | 3. | Remove the starlock washers (1).
| | | 4. | Break the adhesive tape bond path and remove the seal.
| | | 
|
Install Panel - Hinge cover - Upper
| | | Care Point: | Risk of damage. Make sure the panel is installed correctly to help prevent damage to the upper door glass.
|
| | | 1. | If you are installing the old panel and seal, install the panel in reverse order. If not do the steps that follow.
| | | | | Care Point: | Always replace the seal when you fit a new panel, refer to SPC for part numbers.
|
| | | 2. | Remove any remaining adhesive tape from the panel.
| | | 3. | Clean the adhesive tape bond path using a red scotchbrite pad.
| | | | | Care Point: | When you apply cleaner and promoter, obey the manufacturer's flash times.
|
| | | 4. | | | | 5. | Remove the adhesive tape backing from the seal.
| | |
|
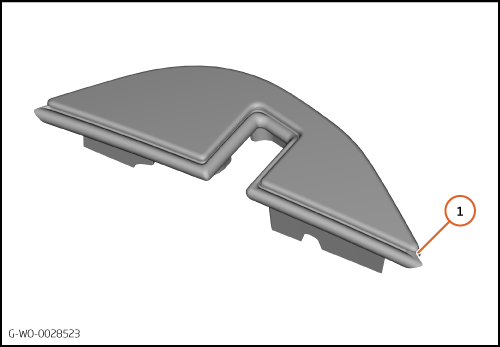
| 6. | Align the seal feature (1) with the panel edge.
| | | | | Care Point: | Make sure the seal is correctly installed.
|
| | | 7. | Press the seal firmly into place.
| | | 8. | Install the starlock washers.
| | | | | Care Point: | Risk of damage. Make sure the panel is installed correctly to help prevent damage to the upper door glass.
|
| | | 9. | Install the panel in reverse order.
| | | 
|