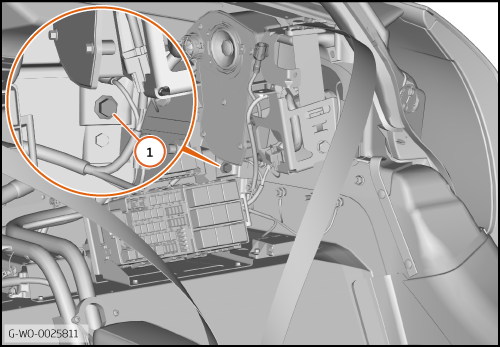
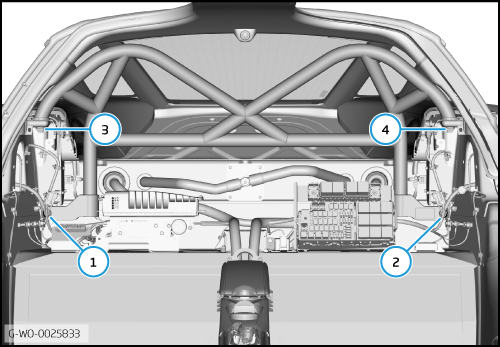
| | | Care Point: | You must not use the bolts (1) to install the harness bar. The correct bolts are supplied in the kit.
|
| | | 1. | | | | 2. | Do step 1 for the right side.
| | | 
|
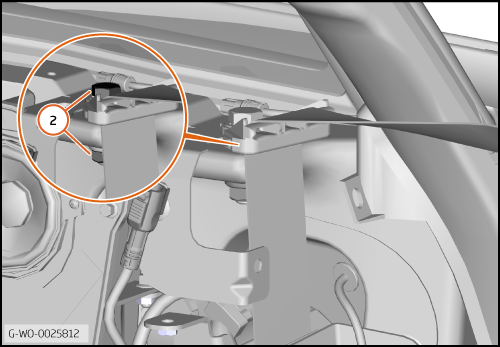
| | | Care Point: | Always replace the seatbelt fixings. Refer to the Spare Parts Catalogue (SPC) for part numbers.
|
| | | 3. | Remove the nut and bolt (2) 35 Nm.
| | | 4. | Do step 3 for the right side.
| | | 
|
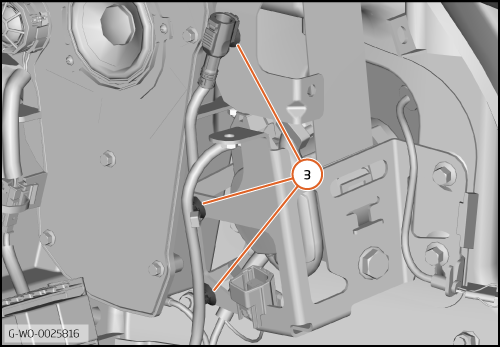
| 5. | Disengage the clips (3).
| | | 6. | Do step 5 for the right side.
| | | 
|
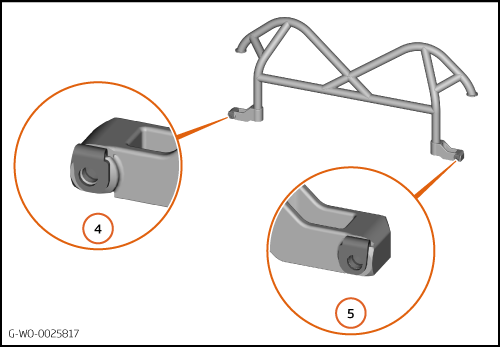
| | | Care Point: | Make sure that you install the conductivity links correctly.
|
| | | 7. | Install the conductivity links (4) and (5) to the rear of the harness bar.
| | | 
|
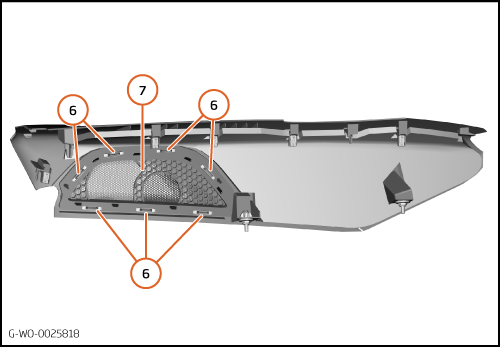
| 8. | Disengage the clips (6) from the removed rear quarter trim and remove the speaker grille (7).
| | | 
|
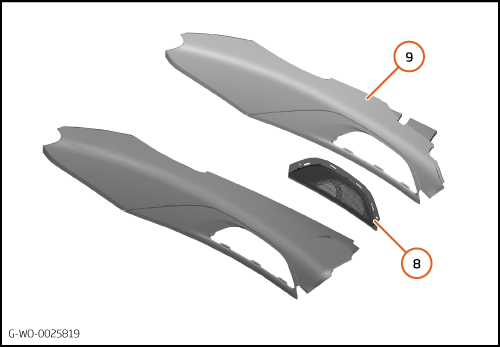
| | | Care Point: | New clips are supplied in the kit.
|
| | | 9. | Install the speaker grille (8) to the new rear quarter trim major (9).
| | | 10. | Do steps 8 and 9 for the other new quarter trim major.
| | | 
|
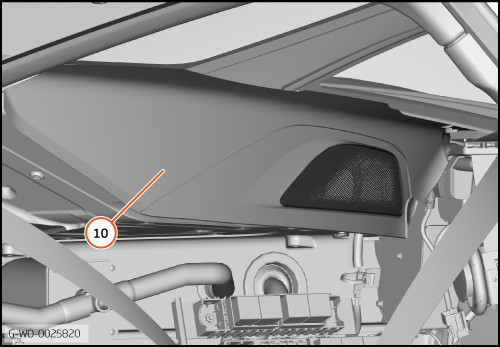
| 11. | Put the new rear quarter trim major (10) into its installation position.
| | | 
|
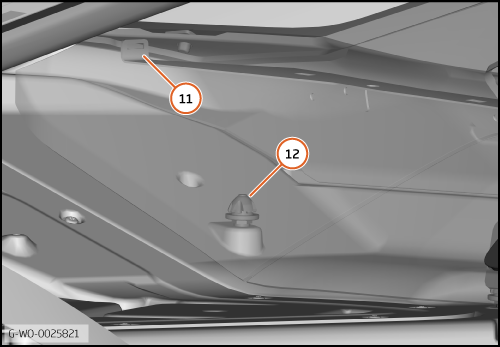
| 12. | Make sure that the clip (11) is correctly aligned. Do not fully engage the clip at this time.
| | | | | Care Point: | Do not engage the remaining clips at this time.
|
| | | 13. | Fully engage the ball stud (12).
| | | 14. | Do steps 11 thru 13 for the right side.
| | | 
|
| | | Care Point: | You must have the aid of one more person for the step that follows.
|
| Care Point: | Make sure that the wires do not catch when you install the harness bar.
|
| Care Point: | Do not cause damage to the interior trim when you install the harness bar.
|
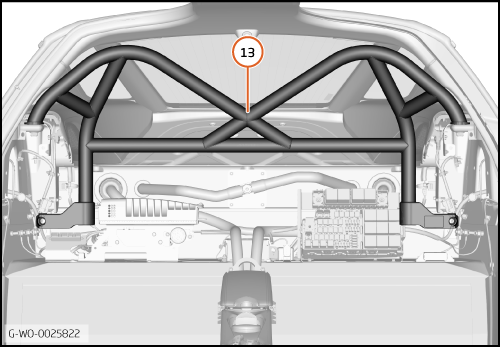
| | | 15. | Put the harness bar into its installation position (13).
| | | 
|
| | | Care Point: | The bolts are supplied in the kit.
|
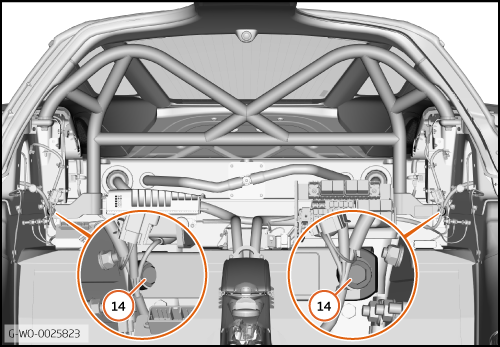
| | | 16. | Loosely install the lower (M10x55) harness bar bolts (14).
| | | 
|
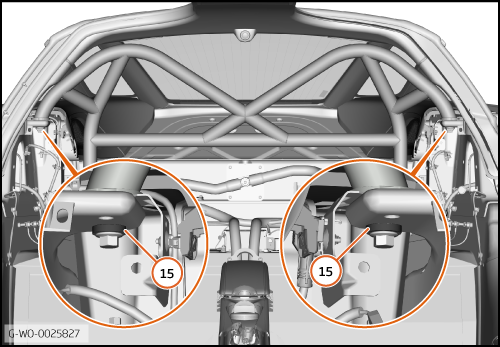
| 17. | Loosely install the upper (M10x50) harness bar bolts. Make sure that you install the roll hoop washer plates (15).
| | | 
|
| 
|
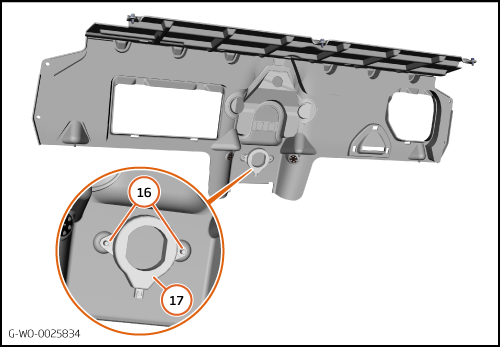
| 20. | Remove the nuts and bolts (16) (M6) 6 Nm and remove the antenna (17) from the removed electrical cover.
| | | 21. | Install the antenna to the new electrical cover.
| | | 
|
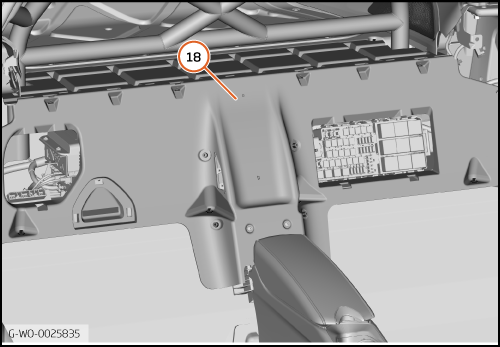
| 22. | Install the new electrical cover (18).
| | | 
|
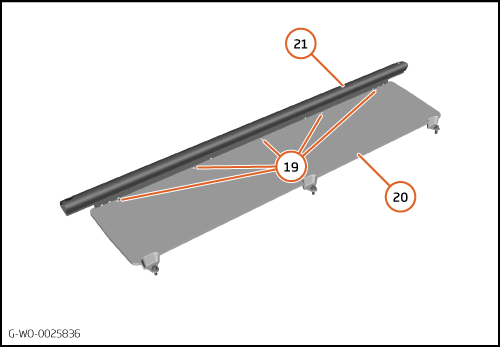
| | | Care Point: | Steps 23 thru 26 are only necessary if the vehicle has a luggage floor support.
|
| Care Point: | New clips are supplied in the kit.
|
| | | 23. | Remove the clips (19) from the removed luggage floor support (20) and the luggage retention bar (21).
| | | 24. | Discard the removed luggage floor support.
| | | 
|
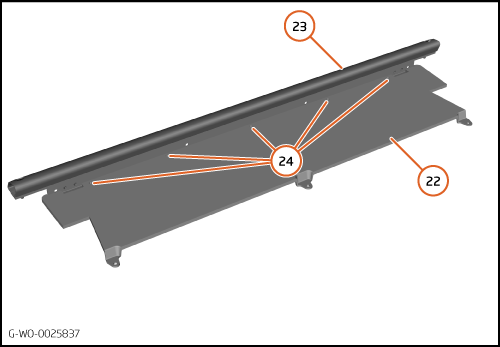
| 25. | Put the new luggage floor support (22) into its installation position on luggage retention bar (23).
| | | 26. | Install the new clips (24).
| | | 
|
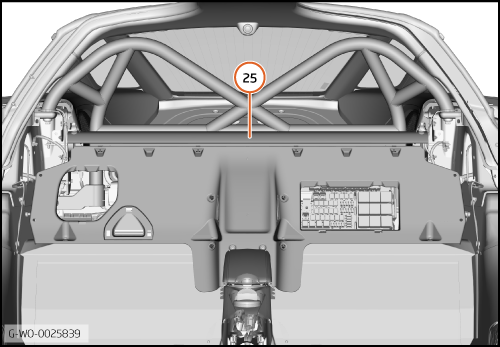
| 27. | Install the luggage retention bar (25).
| | | 
|
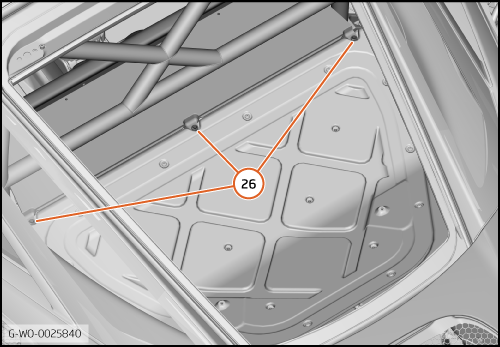
| | | Care Point: | The next step is only necessary if the vehicle has a luggage floor support.
|
| Care Point: | The installation procedure for the new luggage floor support is the same as the removed luggage floor support.
|
| | | 28. | Install the new luggage floor support bolts (26).
| | | 
|
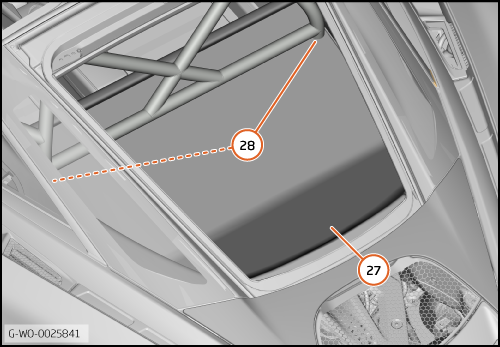
| | | Care Point: | You must have the aid of one more person for the step that follows.
|
| | | 29. | Install the luggage shelf (27).
| | | 30. | Make sure that the luggage shelf is installed correctly around the harness bar (28).
| | | 
|
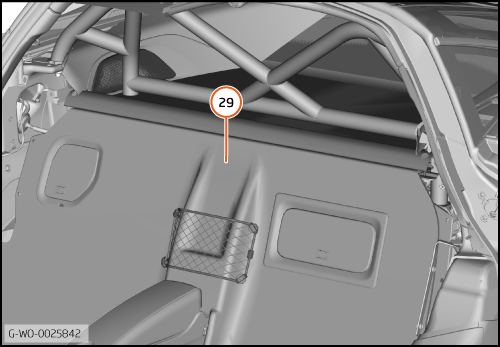
| 31. | Install the rear cover (29).
| | | 
|
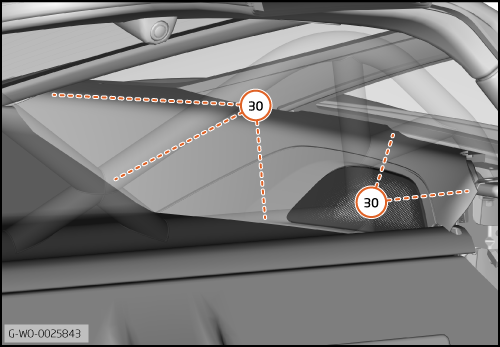
| 32. | Fully engage the remaining rear quarter trim major clips (30).
| | | 33. | Do step 32 for the right side.
| | | 
|
| 34. | Install the seatbelt D-loop (31).
| | | 35. | Do step 34 for the right side.
| | | 
|
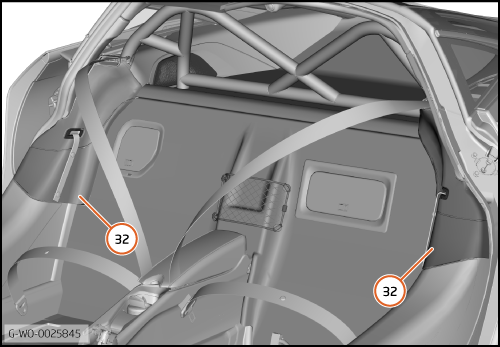
| 36. | Install the B-pillar trims (32).
| | | 
|
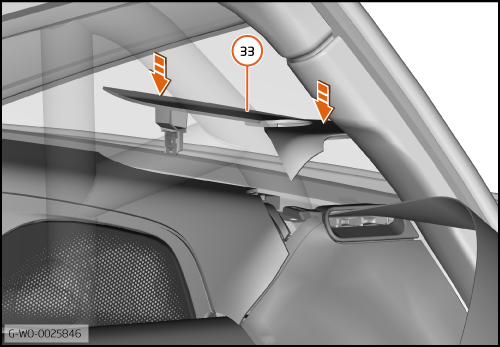
| 37. | Install the rear quarter trim minor (33).
| | | 38. | Do step 37 for the right side.
| | | 39. | Remove any protective covering from the harness bar.
| | | 
|
| | | Care Point: | The foam is only applicable to Federal vehicles.
|
| Care Point: | The foam must be installed to Federal vehicles.
|
| Care Point: | When you apply cleaner, obey the manufacturer's flash times.
|
| | | 40. | | | | 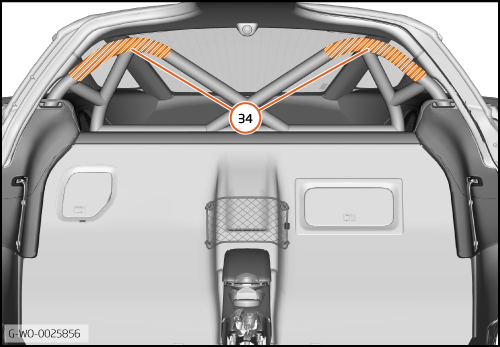
|
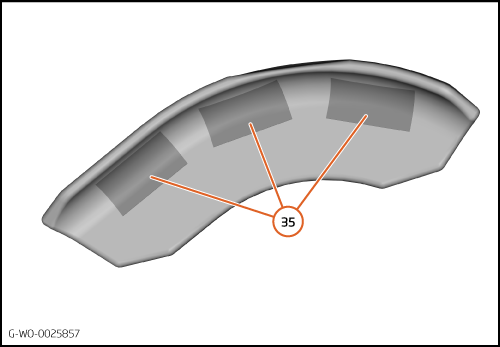
| 41. | Remove the adhesive tape backing (35) from the left foam.
| | | 
|
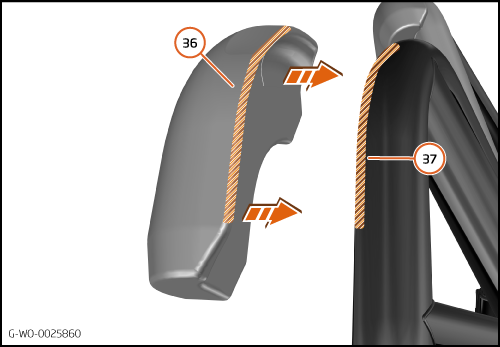
| 42. | Make sure that the contour of the left foam (36) is aligned to the contour of the harness bar (37).
| | | 43. | Put the left foam into its installation position on the harness bar.
| | | 
|
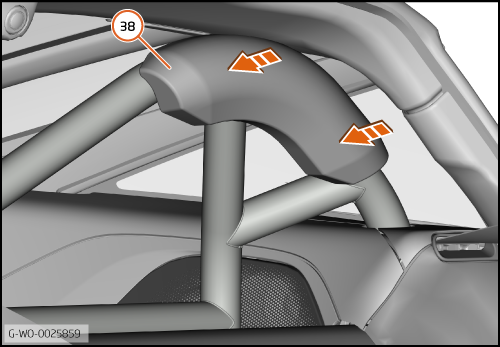
| 44. | Apply pressure to the left foam (38) to make sure that the bond is satisfactory.
| | | 45. | Do steps 41 thru 44 for the right foam.
| | | 46. | For race seats, install the harness retention plates. Refer to Knowledge Article KA-01337.
| | | 47. | | | | 48. | | | | 49. | For more information about how to install the harness, refer to Knowledge Article KA-01337 and the harness manufacturers instructions.
| | | 50. | Install the remaining components in reverse order.
| | | 
|