Preparation work
| 1. | Care Point: Do the two sides.
|
| 2. | |
| 3. | |
| 4. | |
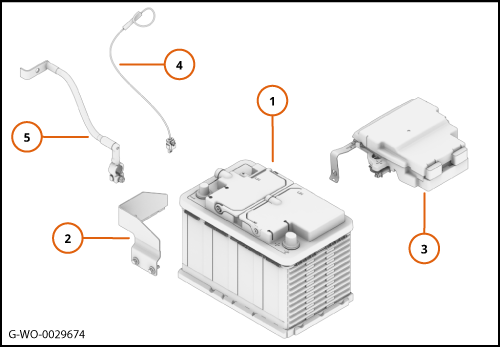
Overview
| 1. | In the procedure below a generation 3 battery will be installed.
| | |
|
| 2. | The illustration shows the new components that you will install.
Section Number
| Description
|
1
| Battery
| 2
| Battery clamp - Right
| 3
| Pre Fuse Box
| 4
| Generation 3 Local Interconnect Network (LIN) harness
| 5
| Negative battery cable
|
| | | 
|
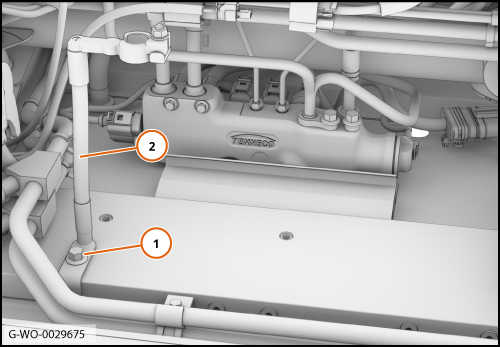
Remove Generation 2 battery
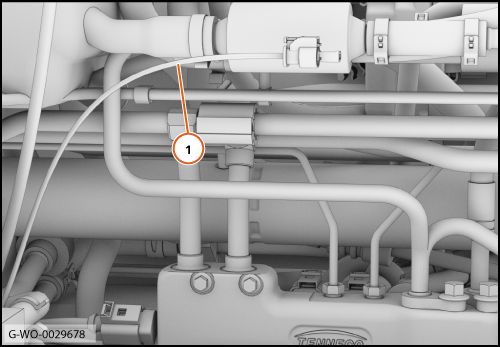
| 1. | | | | 2. | Remove the battery negative cable (2). Discard the cable.
| | | 3. | Remove the pre fuse box cover.
| | | 
|
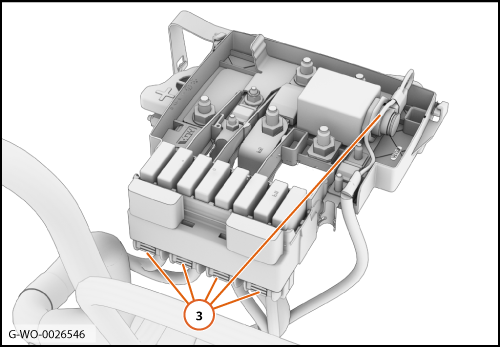
| | | Care Point: | Record the location of the connectors.
|
| | | 4. | Disconnect the electrical connectors (3).
| | | 
|
| 5. | | | | 6. | | | | 7. | Remove the pre-fuse box and discard it.
| | | 
|
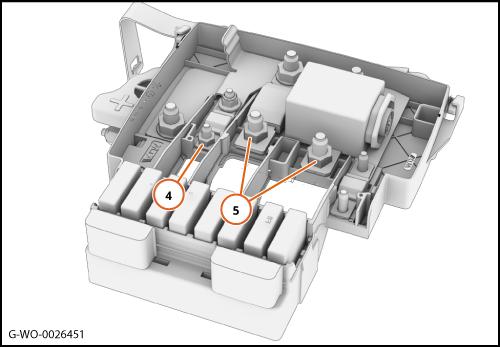
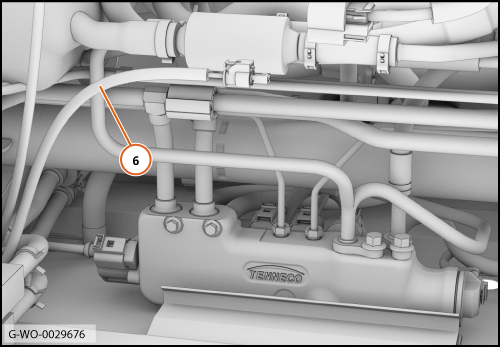
| 8. | Remove the wire protection (6) to access the wire.
| | | 
|
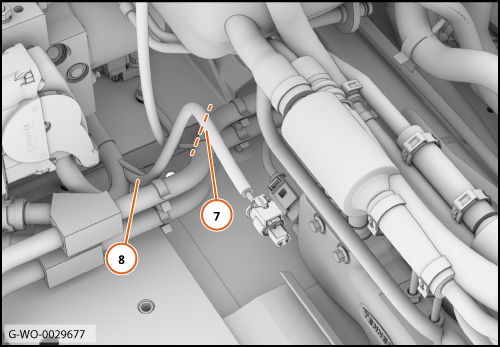
| 9. | Cut the wire (7) 125mm away from the position where it connects to the electrical main body harness (8).
| | | 10. | Discard the electrical connector.
| | | 
|
Install Generation 3 battery
| 1. | | | | 2. | Install the new generation 3 pre-fuse box.
| | | 3. | Install the new generation 3 battery.
| | | 4. | Install the new generation 3 right battery clamp.
| | | 5. | Install the new generation 3 negative battery cable.
| | | 6. | Install the remaining components in reverse order.
| | | 7. | Connect the McLaren Diagnostic System (MDS) and do a Diagnostic Trouble Code (DTC) read and clear.
| | | 8. | Set the correct time and date on the instrument cluster.
| | | 
|