Preparation work
| 1. | |
| 2. | Care Point: Do the left side.
|
| 3. | Care Point: Do the left side.
|
| 4. | Care Point: Do the left side.
|
| 5. | Care Point: Do the left side.
|
| 6. | Care Point: Do the left side.
|
| 7. | Care Point: Do the left side.
|
| 8. | Care Point: Do the left side.
|
| 9. | Care Point: Do the left side.
|
| 10. | Care Point: Do the left side.
|
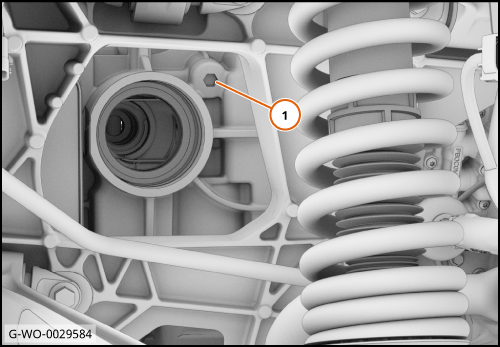
Remove Grub screw - Transmission
| 
|
| | Install Grub screw - Transmission
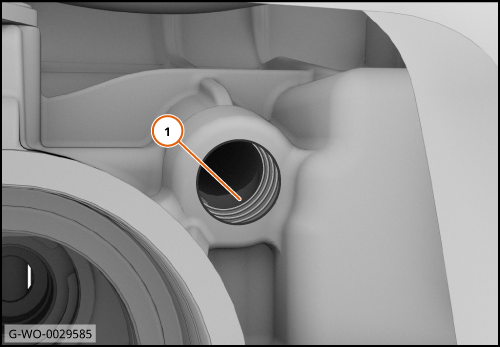
| | | 1. | Use a cloth to clean any unwanted sealant from the threads (1).
| | | 
|
| 2. | Put a cloth into the hole (1) to make sure that no sealant or debris enters the transmission housing.
| | | | | Care Point: | Make sure that you remove all of the unwanted sealant.
|
| Care Point: | Make sure that no sealant or debris enters the transmission housing.
|
| | | 3. | Use an M20x1.5 thread tap to clean the unwanted sealant from the threads.
| | | 4. | Make sure that the tap is turned through 5 full rotations.
| | | 
|
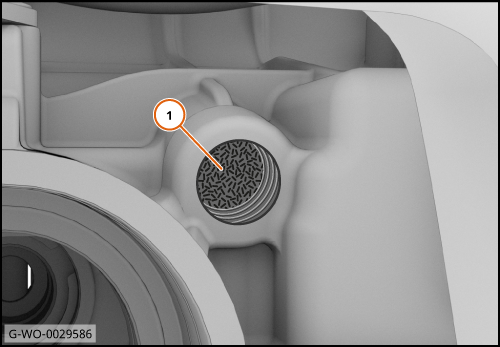
| 5. | Use compressed air to remove the unwanted sealant and debris from the threads (1).
| | | 6. | Use a cloth to clean any unwanted sealant from the threads.
| | | 7. | Remove the cloth from the hole.
| | | | | Care Point: | Always replace the grub screw. Refer to the Spare Parts Catalogue (SPC) for part numbers.
|
| | | 8. | | | | 9. | Install the new grub screw by hand.
| | | 10. | | | | | | Care Point: | Risk of damage. You must wait a minimum of 12 hours before you start the vehicle to let the threadlock cure.
|
| | | 11. | Install the remaining components in reverse order.
| | | 
|