| | | Care Point: | Two persons are necessary for this procedure.
|
| Care Point: | Make sure there are no DTCs or issues relating to the vehicle suspension, and that all tyres are at the correct pressures before starting.
|
| | | 1. | Make sure an area of at least 6 metres (M1) x 3.5 metres (M2) (20 feet x 12 feet) is used.
The area must be clear of obstructions with no prominent floor markings.
| | | 2. | Remove the vehicle from lift mode.
| | | 3. | Close the doors.
| | | 4. | Unfold the door mirrors.
| | | 5. | Remove any exterior covers.
| | | 
|
| | | Care Point: | Mark out straight lines with string, tape down each end of the string. Tape out a new line, adjacent to the string and following its entire length.
|
| Care Point: | Make sure the marked lines (L1) extend to the edge of the area.
|
| | | 6. | Mark out lines (L1) across the front edge of the vehicle, in line with the front splitter.
Mark out lines (L1) across the rear edge of the vehicle, in line with the rear bumper.
| | | 
|
| | | Care Point: | The lines (L2) must be parallel with the car. The tape should be in line with the rear wheels, and 22mm away from the edge of the front wheels.
|
| | | 7. | Measure 22mm at a 90 degree angle from the contact point of each front wheel. Mark this point.
| | | | | Care Point: | The tape/string should be straight between the two points.
|
| | | 8. | Mark out the lines (L2) parallel to the vehicle, in-line with the rear wheel and covering the marked 22mm point.
Make sure the marked lines (L2) extend to the edge of the area.
| | | 
|
| | | Care Point: | The mats (T) have one side of the triangle running parallel to the edge of the mat. This edge needs to be closest to the car.
|
| | | 9. | Place the triangle mats (T) with the "top" of the triangle pointing away from the vehicle (Rear right shown).
| | | 
|
| 1. | Enter the vehicle and close both doors.
| | | 2. | Connect McLaren Diagnostic System and proceed to Diagnostic Toolbox within Advanced Driver Interface (ADI).
| | | 3. | Access sequences.
| | | | | Care Point: | Sequences will start the calibration.
|
| | | 4. | Carry out Calibrate Camera Sequence.
| | |
|
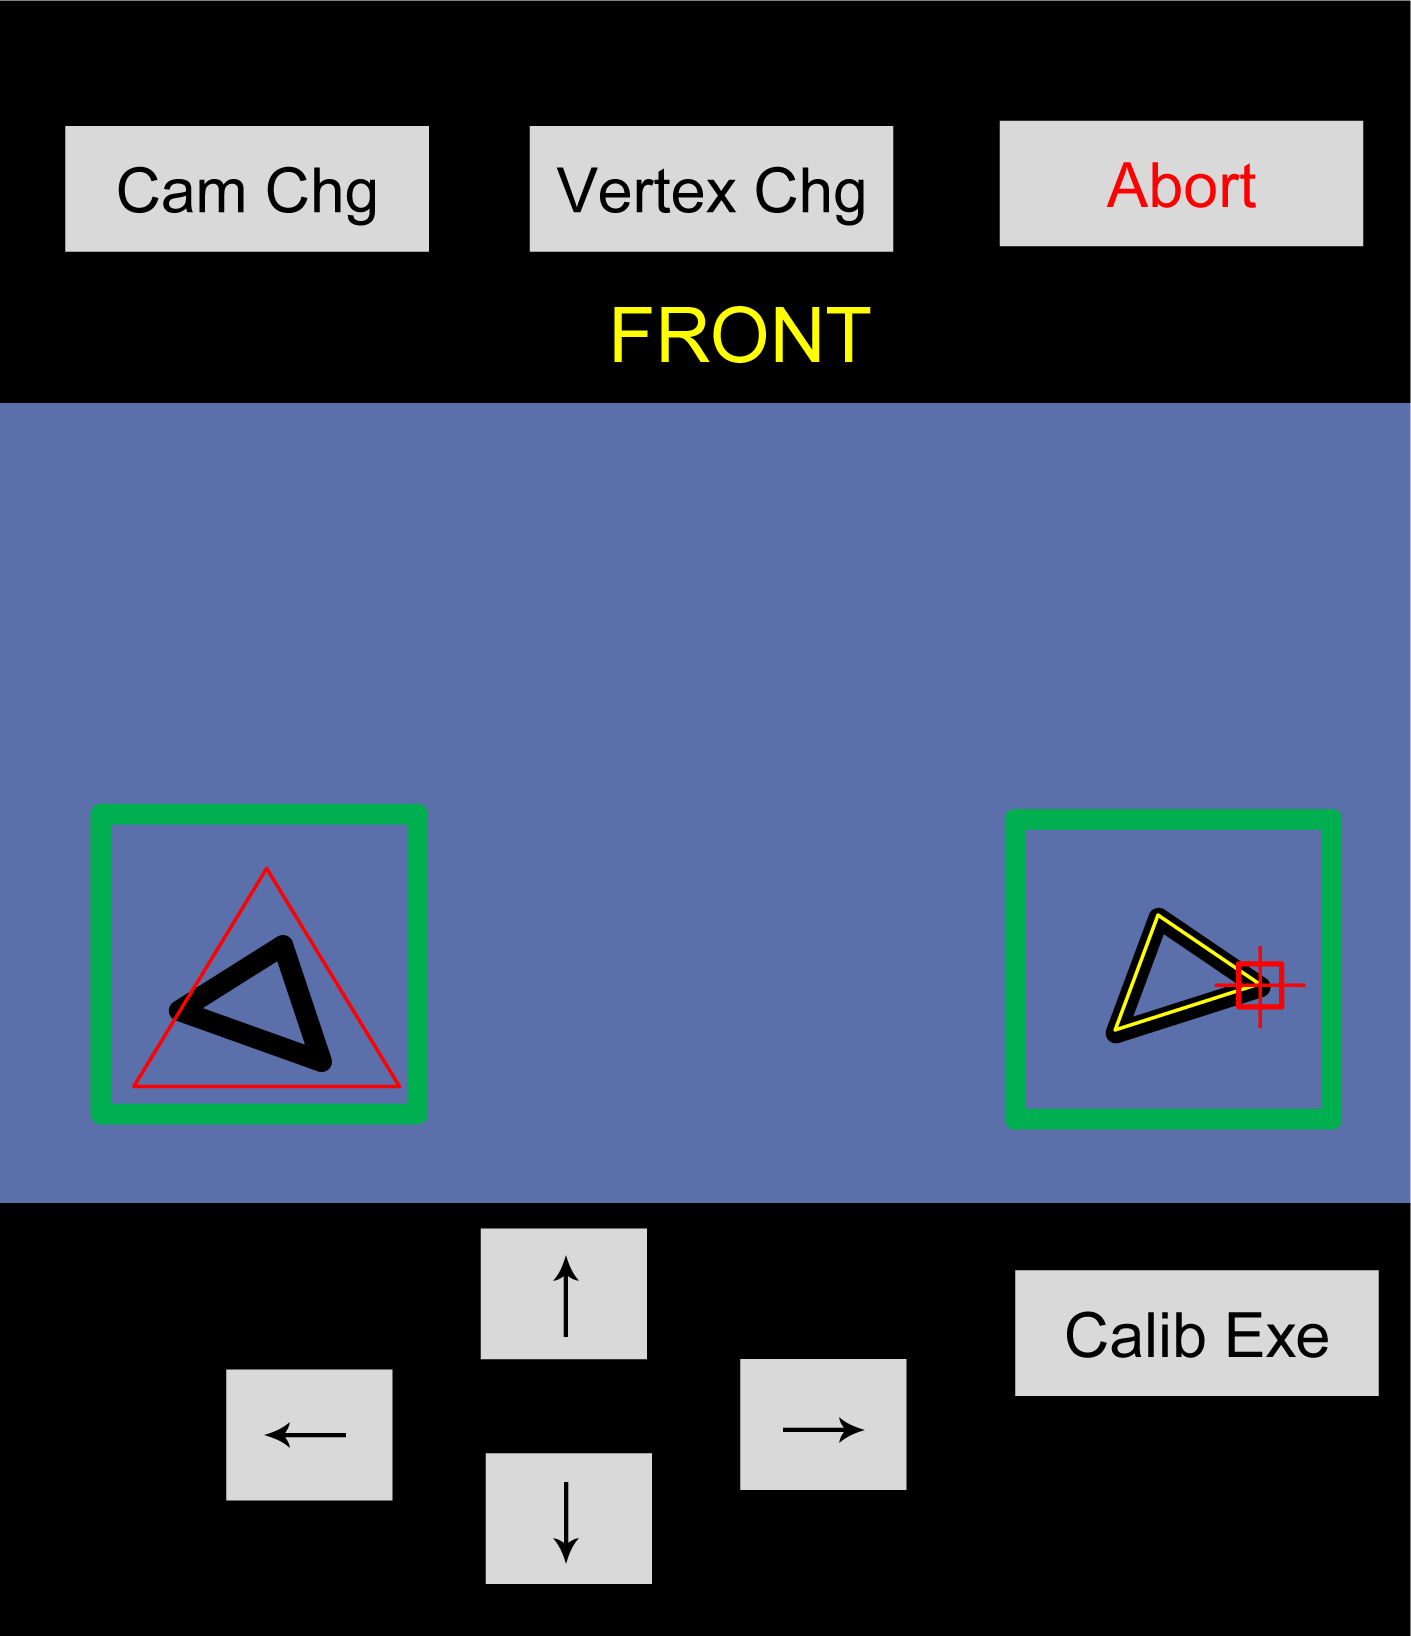
| 5. | Centre display will show controls as follows:
Arrow Buttons - Used to move the calibration marker.
Abort - Cancels calibration sequence.
Calib Exe - Starts calibration.
Cam Chg - Changes between the camera views.
Vertex Chg - Changes which corner (or Vertex) of the triangle is being adjusted.
| | | 
|
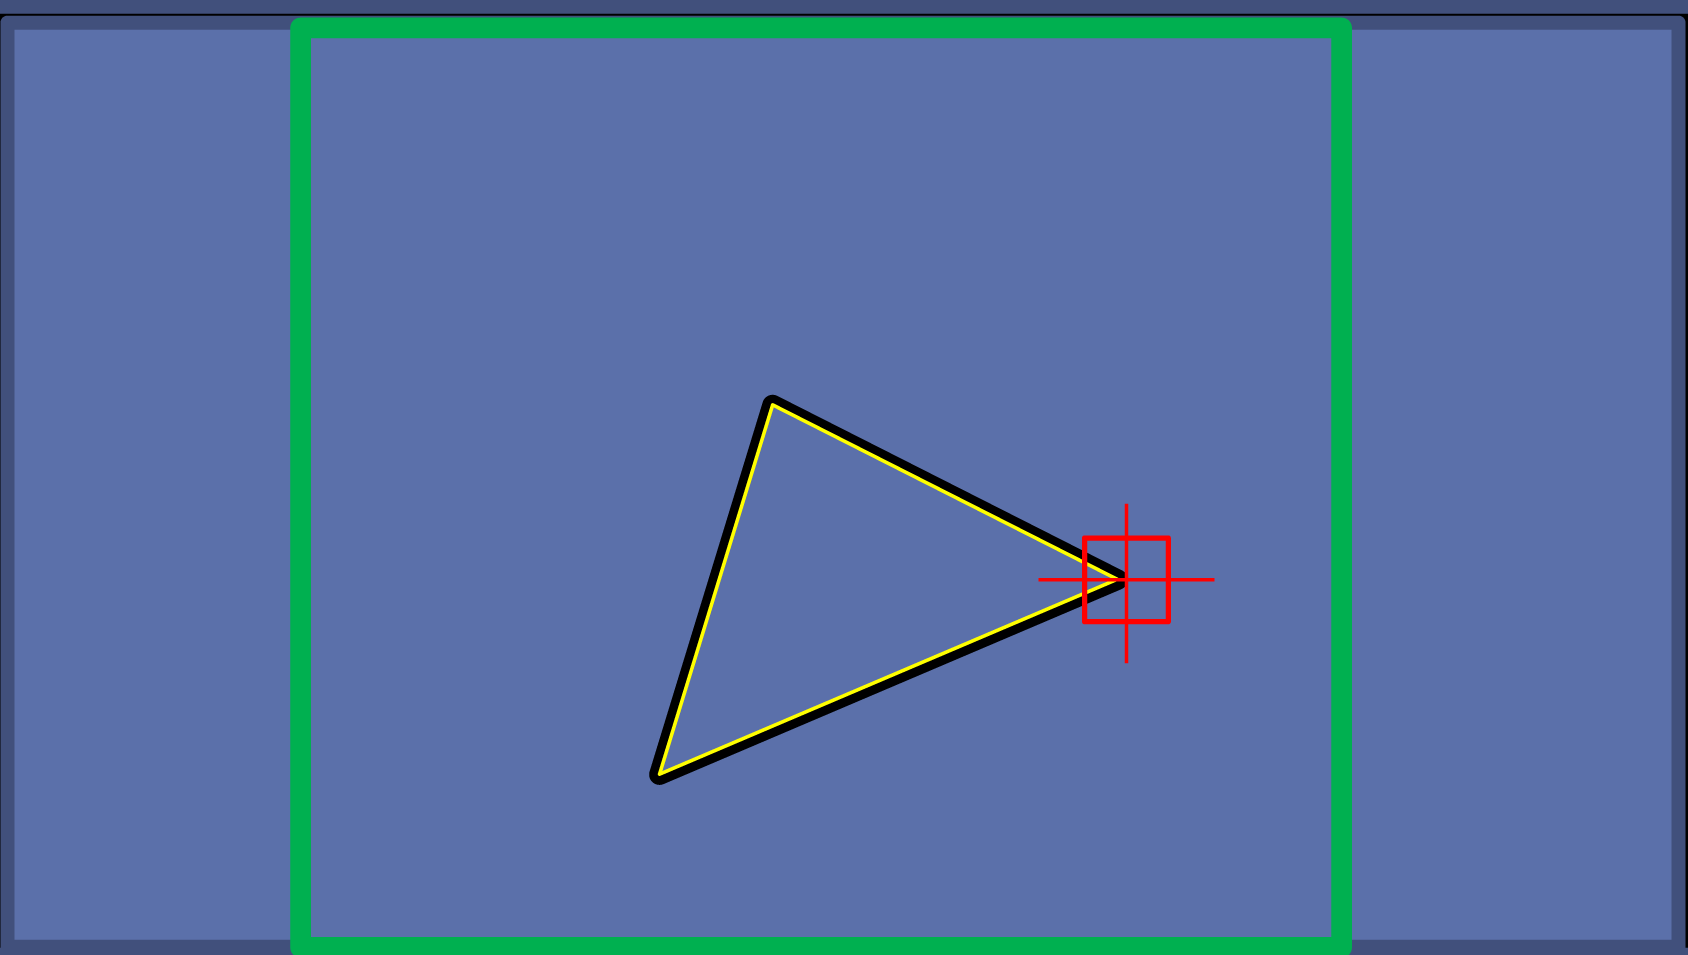
| 6. | The driver display enlarges the camera view.
| | | 
|
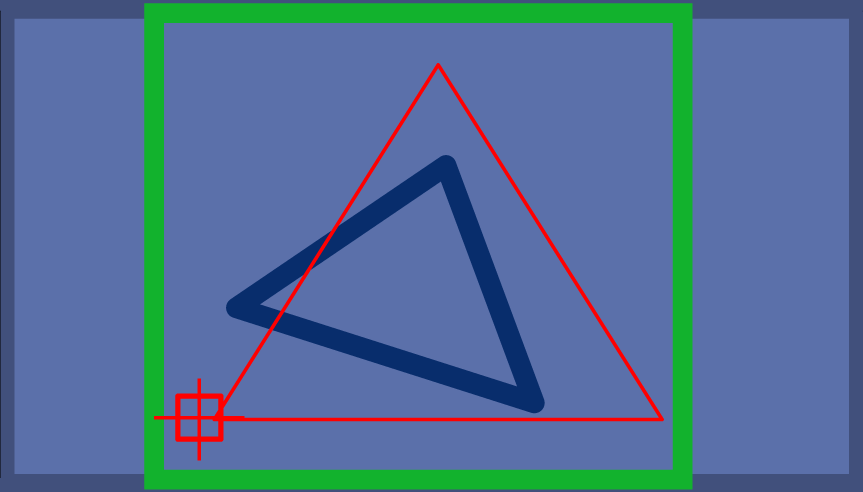
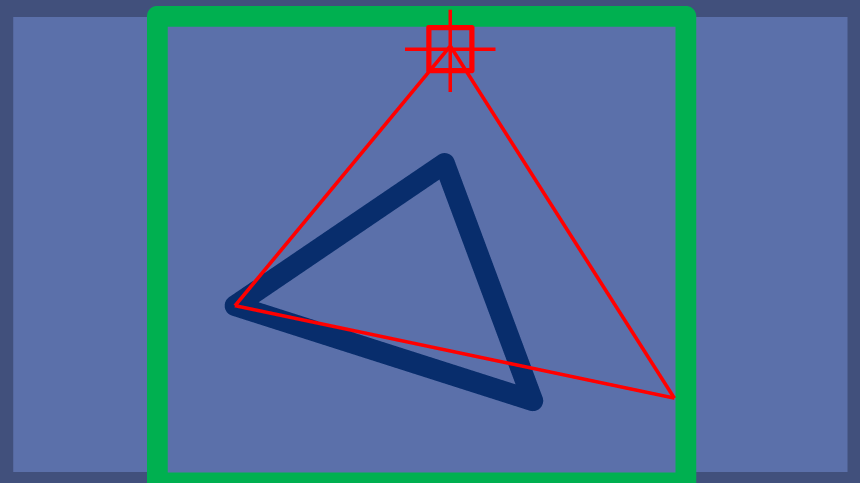
| 7. | Use the arrow buttons to move the adjustment marker to the first corner of the triangle mat.
| | | 
|
| 8. | Once aligned, press the Vertex Chg button.
| | | 
|
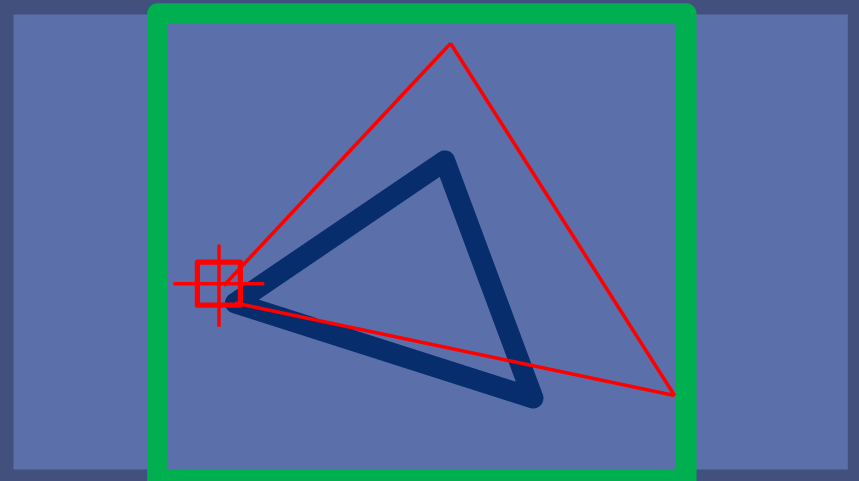
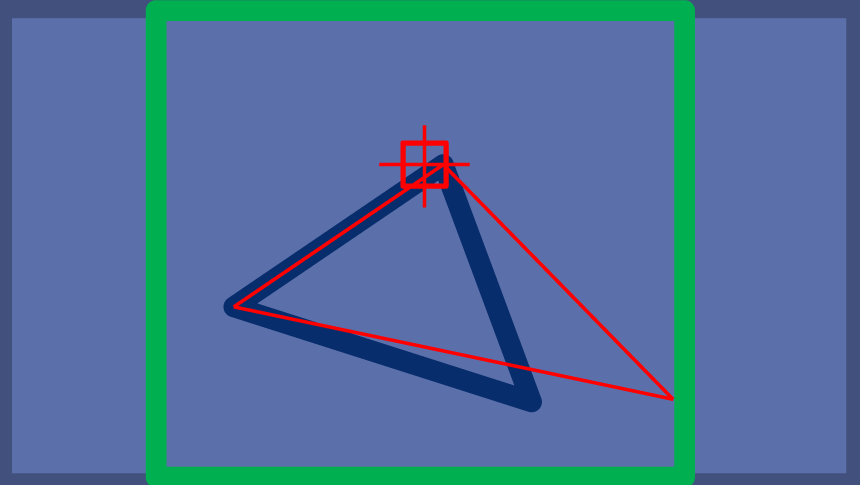
| 9. | Use the arrow buttons to move the adjustment marker to the second corner of the triangle mat.
| | | 
|
| 10. | Once aligned, press the Vertex Chg button to change to the next corner.
| | | 
|
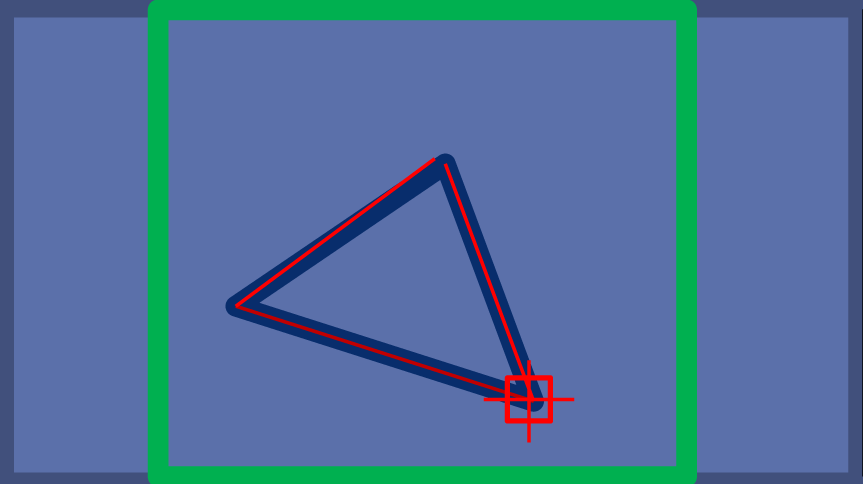
| 11. | Use the arrow buttons to move the adjustment marker to the third corner of the triangle mat.
| | | 
|
| 12. | Once aligned, press the Vertex Chg button to change to the next triangle mat.
| | | | | Care Point: | There are Eight camera views in total.
|
| | | 13. | Repeat steps 9 to 14 for all cameras.
| | | 14. | Press the Calib Exe button.
| | | 
|
| | | Care Point: | If the calibration is unsuccessful, run the adjustment procedure again or Abort.
|
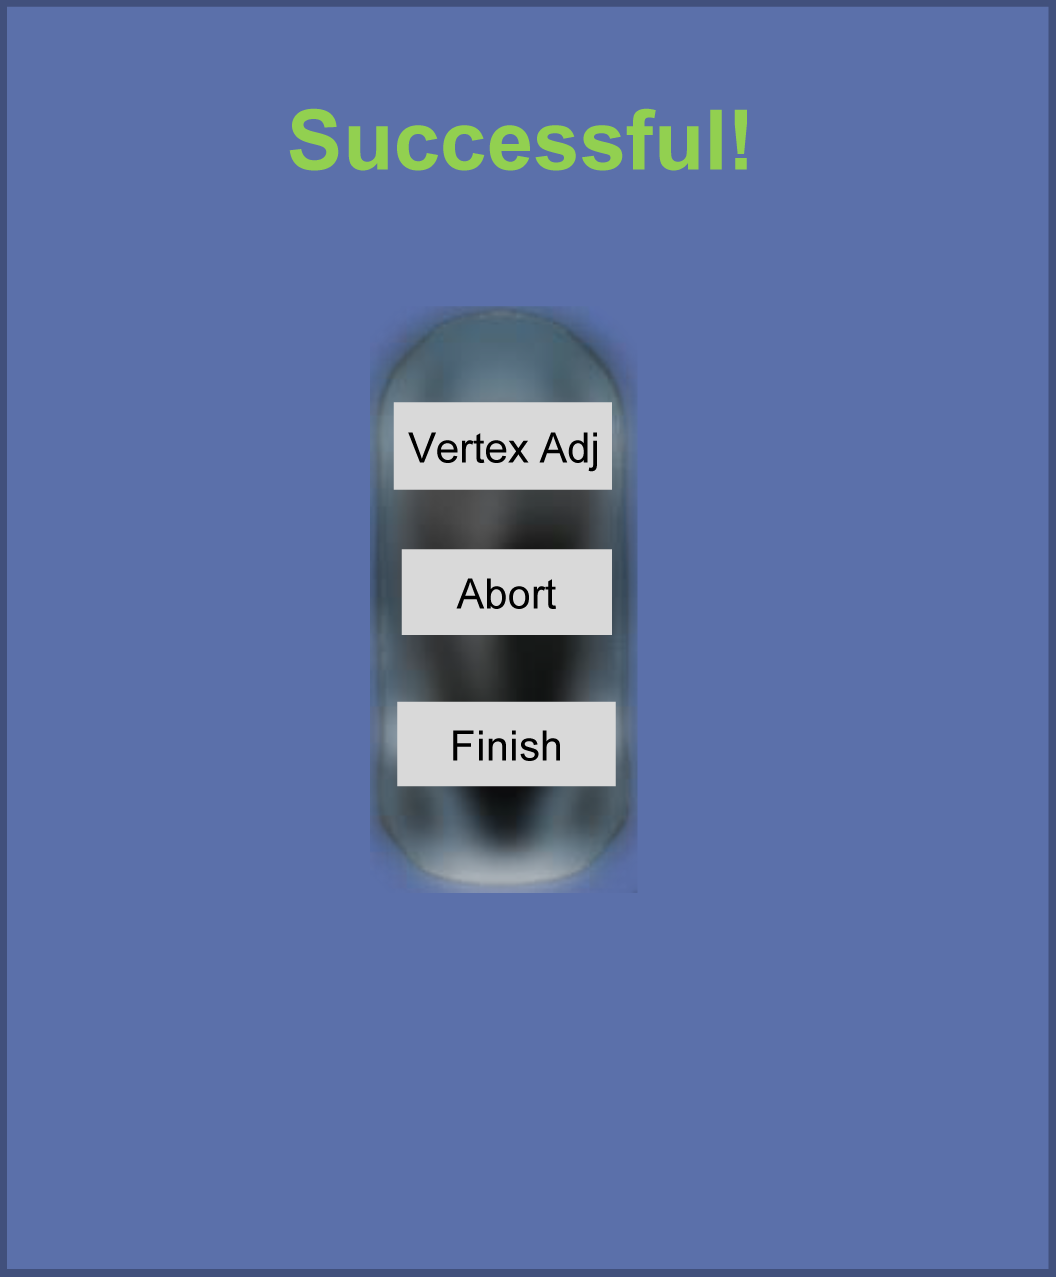
| | | 15. | If successful, press Finish.
Using the triangle mats and marked lines (L1/L2), check the image is calibrated correctly.
| | | 16. | Press one of the three buttons to continue:
Vertex Adj - Return to the adjustment screens to calibrate again.
Abort - Cancels calibration sequence, returning to normal ADI interface.
Finish - Saves calibration, returning to normal ADI interface.
| | | 
|