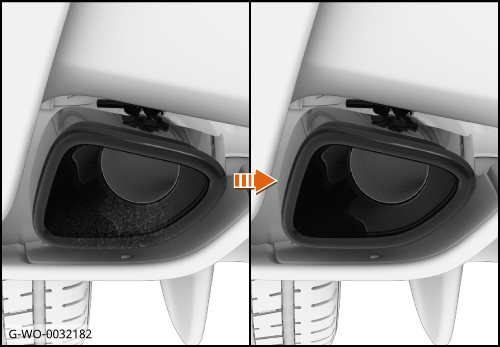
Clean Exhaust finisher - 570S/720S/750S/Artura - Gloss black finishes
| | | Care Point: | Exhaust gas deposits are usually red, orange or brown and often give the appearance of rust.
|
| Care Point: | Make sure that the exhaust finisher is at ambient temperature before continuing with the steps that follow
|
| Care Point: | Do not use any acid based cleaning chemicals.
|
| Care Point: | Do not use any abrasive materials on a gloss exhaust finisher.
|
| | | 1. | Use warm soapy water and a sponge or coarse cloth to clean the exhaust finisher.
| | | 2. | Repeat the step until all the deposits have been removed.
| | | 
|
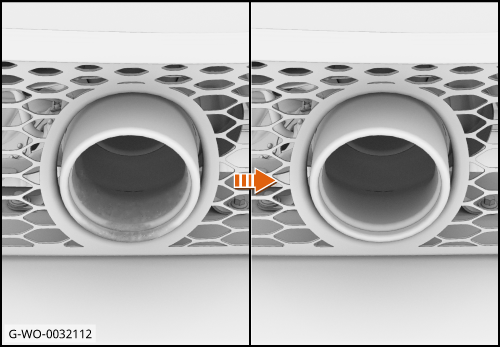
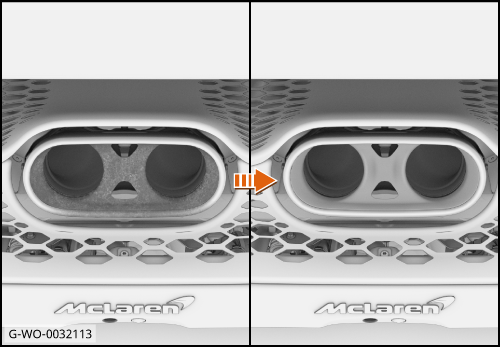
Clean Exhaust finisher - 570S/720S/750S/Artura - Matt black and matt silver finishes
| | | Care Point: | Exhaust gas deposits are usually red, orange or brown and often give the appearance of rust.
|
| Care Point: | Make sure that the exhaust finisher is at ambient temperature before continuing with the steps that follow
|
| Care Point: | Do not use any acid based cleaning chemicals.
|
| | | 1. | Use warm soapy water and a sponge or coarse cloth to clean the exhaust finisher.
| | | 
|
| | | Care Point: | Only do the step that follows if the exhaust gas deposits will not clean off with warm soapy water.
|
| Care Point: | Risk of damage. When using the scotch-brite abrasive pad, proceed slowly with light pressure.
|
| | | 2. | | | | 3. | Repeat steps 1 thru 2 until all the deposits have been removed.
| | | 
|
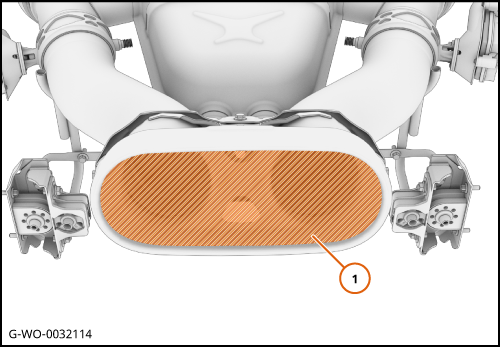
Clean Exhaust finisher - 750S - Silver Finish
| | | Care Point: | If the stainless steel finish has become yellow in colour then do the steps that follow.
|
| Care Point: | Make sure that the exhaust finisher is at ambient temperature before continuing with the steps that follow
|
| Care Point: | Do not use any acid based cleaning chemicals.
|
| | | 1. | Use warm soapy water and a sponge to clean the exhaust finisher.
| | | 2. | Use a clean mirco fibre cloth to dry the exhaust finisher and surrounding area.
| | |
|
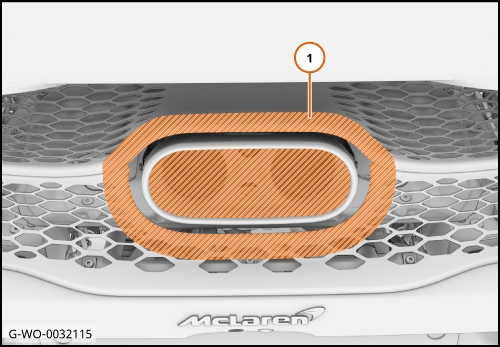
| | | Care Point: | A low adhesion masking tape must be used to avoid damage to the matt black surface.
|
| | | 3. | Apply a low adhesion masking tape around the inner matt black finisher area (1).
| | | 
|
| | | Care Point: | A low adhesion masking tape must be used to avoid damage to the outer grille painted surface.
|
| | | 4. | Apply a low adhesion masking tape around the outer rear grille area (1).
| | | 
|
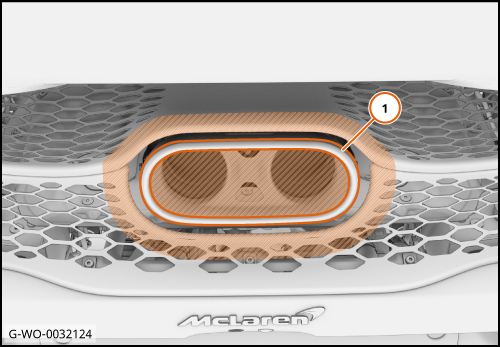
| | | Care Point: | Do not use any type of abrasive pads that could damage the surface finish.
|
| Care Point: | Make sure that the silver finisher is cleaned/polished uniformly.
|
| | | 5. | Use Autoglym Metal Polish or Autosol Metal Polish or an equivalent product with a sponge or micro fibre cloth to remove the yellow discoloration and return it back to the original silver finish in the area shown (1).
| | | | | Care Point: | Make sure you remove all the masking tape before you start the engine.
|
| | | 6. | Remove all the masking tape.
| | | 
|