 WARNING! WARNING!
| |
Possible fluid spills from vehicle systems during repairs or maintenance.
Risk of thermal incidents, slip hazards, corrosion of electrical components, failure of electrical or mechanical components or unwanted odours.
Always limit fluid spills and fully clean the spilled fluid after repairs or maintenance.
| |
Remove Water pump sprocket
| | | Care Point: | The engine oil must be drained to complete this repair.
Add the drain/fill procedure time to this repair to get the total labour time.
|
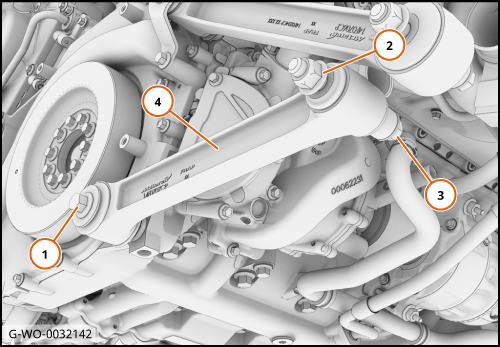
| | | 1. | Support the engine with a transmission jack (1).
| | | 
|
| | | Care Point: | Always replace the bolts. Refer to the Spare Parts Catalogue (SPC) for part numbers.
|
| | | 2. | Remove the lower engine mount (4).
| | | 
|
| | | Care Point: | Use an applicable container to collect the fluid.
|
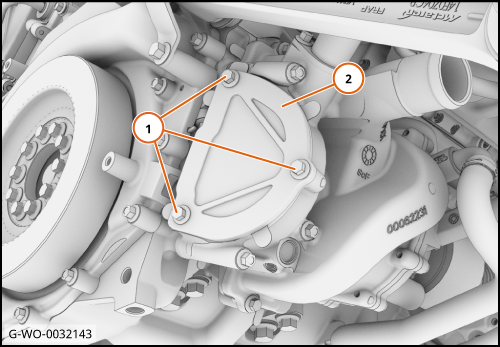
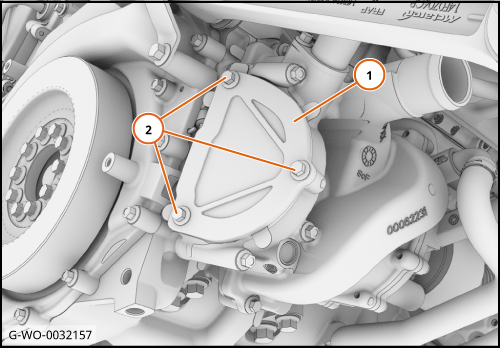
| | | 3. | Remove the water pump cover (2).
| | | 
|
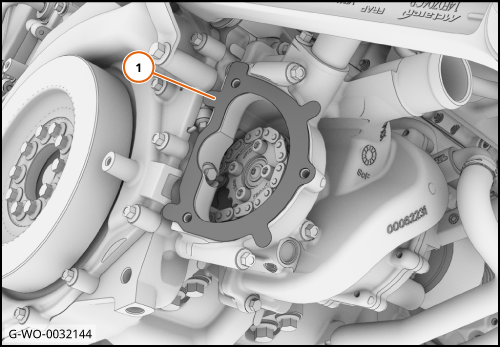
| | | Care Point: | Always replace the gasket. Refer to the SPC for part numbers.
|
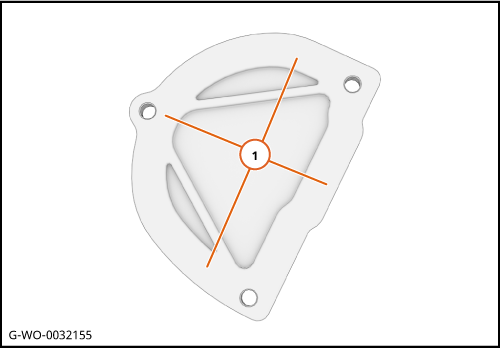
| | | 4. | Remove and discard the gasket (1).
| | | 
|
| | | Care Point: | Always replace the bolts (1). Refer to SPC for part numbers.
|
| | | 5. | | | | 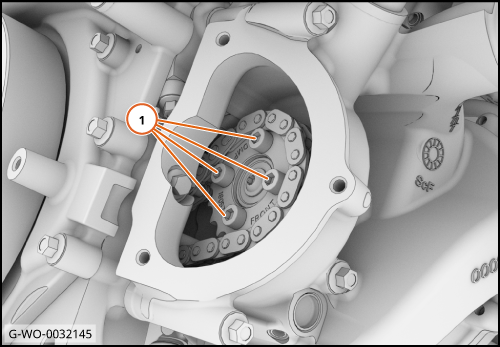
|
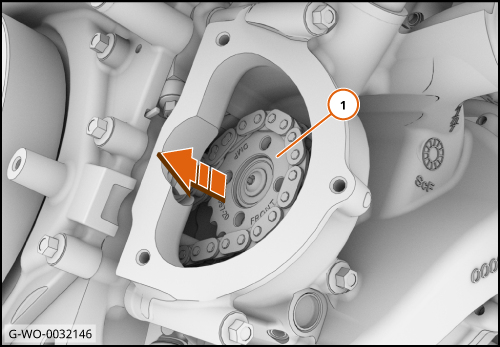
| | | Care Point: | Risk of damage. Make sure you do not damage the coolant pump housing.
|
| Care Point: | Risk of damage. If you apply any leverage do not use tools with square shafts.
|
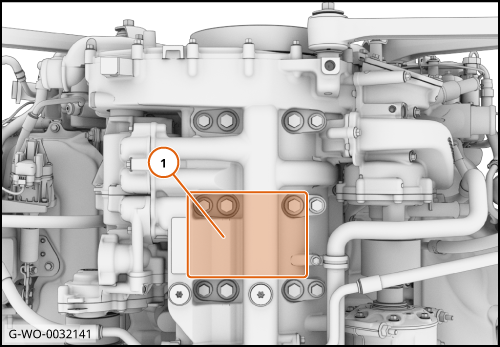
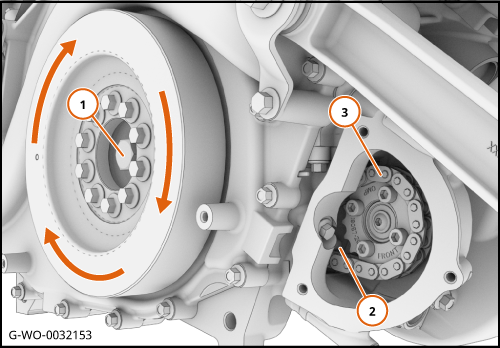
| | | 6. | Remove the sprocket (1) from the water pump spindle in the direction shown.
| | | 
|
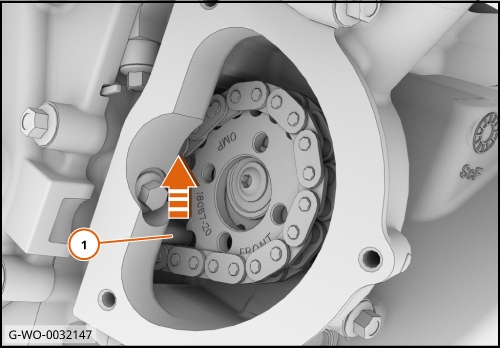
| | | Care Point: | You must release the tension from the top of the chain.
|
| | | 7. | Apply pressure to the chain tensioner (1) in the direction shown.
| | | 
|
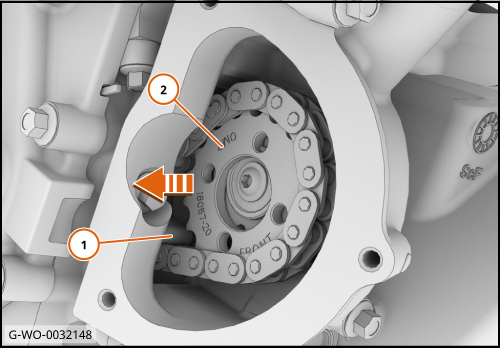
| 8. | Maintain pressure on the chain tensioner (1) and remove the chain from the sprocket (2).
Remove the sprocket in the direction shown.
| | | 
|
Install Water pump sprocket
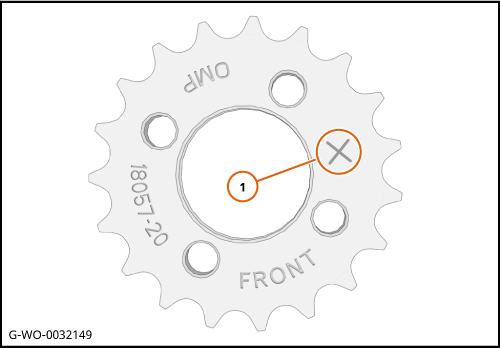
| | | Care Point: | Make sure you only fit sprockets marked with an X.
|
| Care Point: | Make sure the sprocket is installed with front on the outer surface.
|
| | | 1. | Locate the X mark (1) on the new sprocket.
| | | 
|
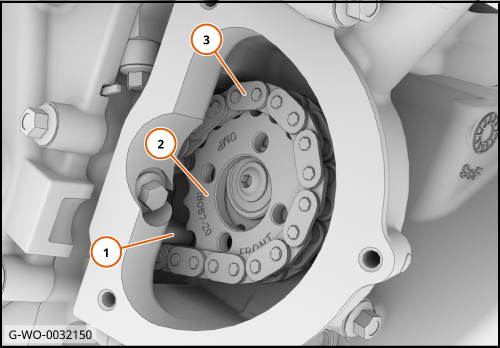
| 2. | Apply and maintain pressure on the chain tensioner (1).
Install the water pump sprocket (2) and feed the chain around the sprocket (3).
| | | 
|
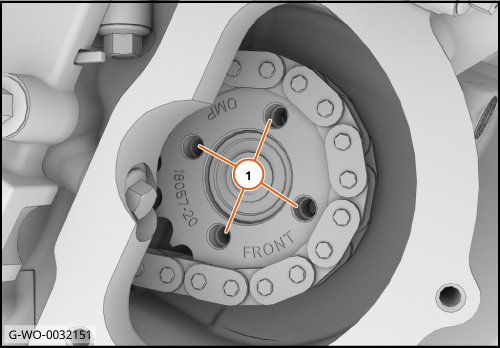
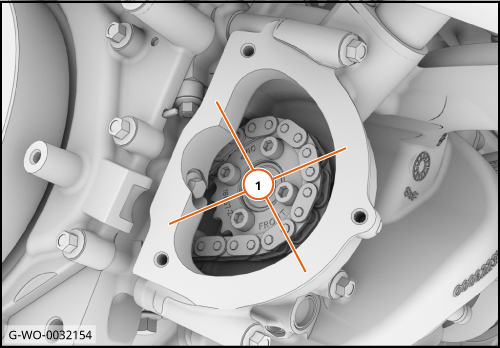
| 3. | Install the sprocket onto the water pump spindle.
Make sure that the sprocket is aligned with the water pump (1).
| | | 
|
| 4. | Loosely Install the bolts.
| | | 
|
| | | Care Point: | Risk of damage. Only rotate the crankshaft in a clockwise direction.
|
| Care Point: | Risk of damage. If abnormal noise or resistance is felt or rotation is difficult or loud, stop and check the installation before you proceed.
|
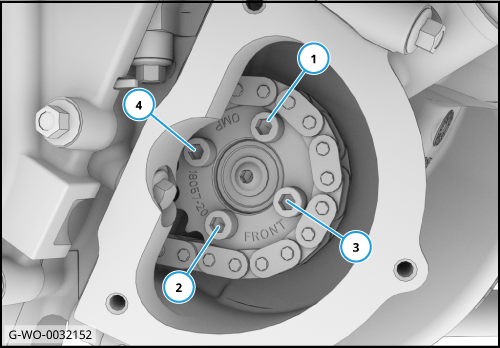
| | | 5. | Rotate the crankshaft (1) clockwise through 720° and inspect the chain guide and tensioner (2).
Make sure the chain (3) is correctly aligned.
| | | 
|
| | | Care Point: | Make sure that there is no loose material inside the coolant pump housing.
|
| | | 6. | Clean the mating surface of the water pump (1) with Loctite 7063.
| | | 
|
| 7. | Clean the mating surface of the cover plate (1) with Loctite 7063.
| | | 
|
| | | Care Point: | Always replace the gasket. Refer to the SPC for part numbers.
|
| Care Point: | Make sure that the gasket is correctly orientated.
|
| | | 8. | Install the gasket (1).
| | | 
|
| | | Care Point: | Make sure that the gasket tabs are not trapped between the mating surfaces.
|
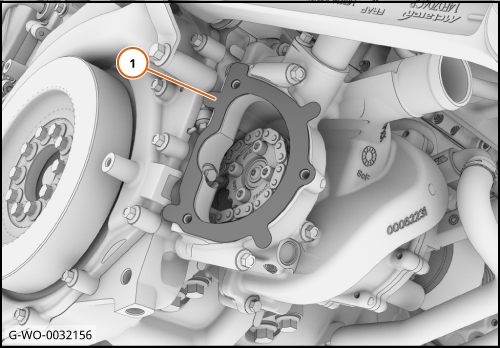
| | | 9. | Install the cover plate (1).
| | | 
|
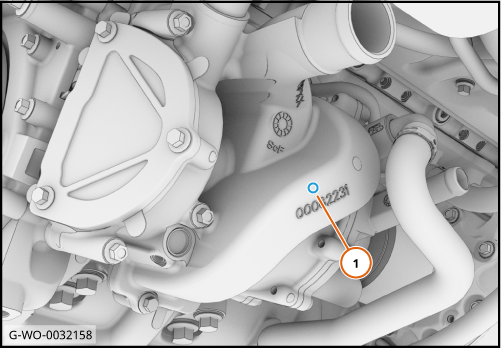
| 10. | Apply a blue paint pen mark to the water pump in the location shown (1).
| | | 11. | Install the remaining components in reverse order.
| | | 
|